
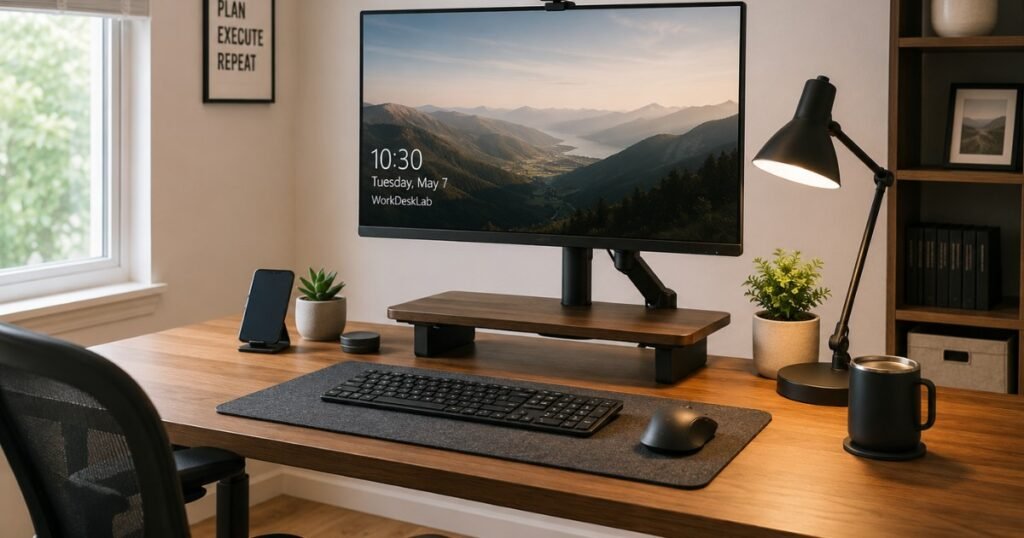
If you’ve worked from home for a while, you’ve probably had the same experience I did. What began as a temporary setup slowly became my everyday workspace—and I didn’t realize how many small problems I’d been putting up with until they started affecting my work.
That’s when the problems start showing up. A stiff neck by lunchtime. A sore back by Friday. Chargers, cables, and notebooks slowly taking over the desk. Meanwhile, the spending never seems to stop—another lamp, another productivity gadget, another purchase that promises to fix everything but rarely does.
The problem isn’t a lack of effort. It’s that most home office advice starts with expensive gear instead of the fundamentals that actually make daily work more comfortable and productive.
This guide takes the opposite approach. We’ll start with ergonomics, then improve lighting, organization, and workflow before looking at the accessories that are genuinely worth buying. Whether you’re working from a dedicated office or a small corner of your home, the goal is simple: build a workspace that feels better to use every single day.
Before You Start
Don’t worry about buying everything at once.
Most people only need to improve a few key areas to notice a big difference.
Focus on these priorities first:
- Comfort — Chair, desk, and monitor height.
- Lighting — Reduce eye strain and improve video calls.
- Organization — Keep cables and everyday items under control.
- Workflow — Build habits that help your desk stay organized.
- Accessories — Buy only the tools that solve real problems.
Tip: If your budget is limited, start from the top of this list and work your way down.
Start With Comfort, Not Gadgets
Walk into most home offices built in the last few years and you’ll notice the same pattern: a nice keyboard, a ring light, maybe a desk mat with a city skyline printed on it — and a $40 chair from a big-box store propping the whole thing up.
That’s the mistake. Comfort is invisible until it’s gone, and by then the damage is already showing up as tension headaches or a sore lower back that seems to arrive out of nowhere.
The biggest mistakes new WFH workers make
The most common one is furnishing the desk before furnishing the body. A great monitor arm does nothing for someone slouched in a chair that offers no lumbar support. Another frequent mistake is treating the home office like a temporary arrangement for years, which quietly discourages any real investment in the pieces that matter.
The three upgrades that matter most
If only three things get budget priority, they should be a chair that actually supports your lower back, a desk at the correct height for your body, and lighting that doesn’t strain your eyes by 3 p.m. Everything else is optional polish.
Budget first, aesthetics later
A clean, color-coordinated desk photographs well, but it doesn’t fix a bad chair. A practical rule of thumb: spend on function first, and let the aesthetics catch up once the essentials are handled. Most people who reverse this order end up rebuying furniture twice.
Essential Ergonomics: Setting Up Your Chair and Desk for Zero Pain
Ergonomics sounds like a technical word for something fairly simple: making sure your body isn’t fighting your workspace for eight hours a day. Get this right and most day-to-day aches quietly disappear on their own.
Choosing the right chair
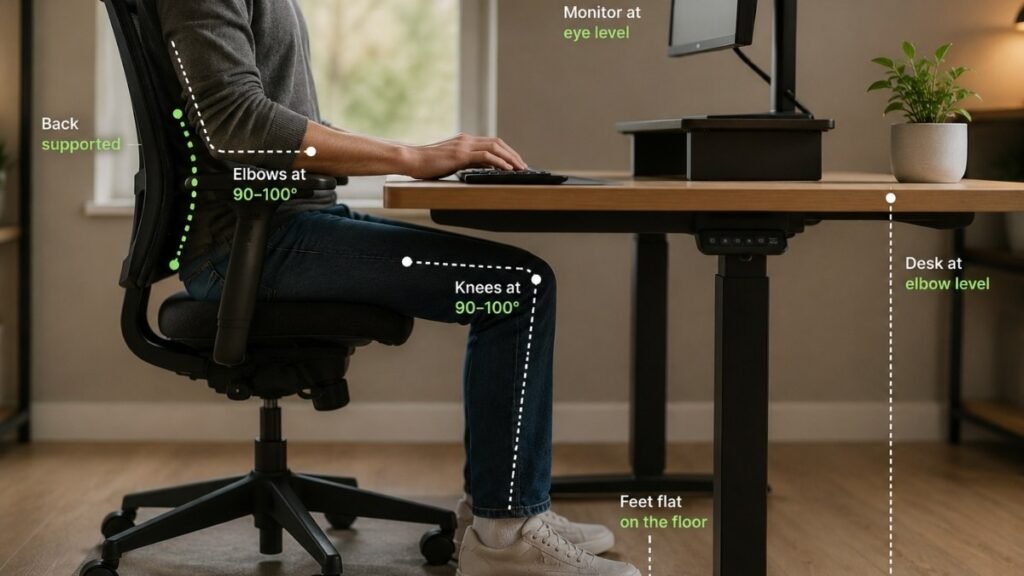
Look for adjustable lumbar support, a seat depth that lets your back touch the backrest while your knees still bend comfortably at the edge, and armrests that don’t force your shoulders up. Price matters less than fit — a mid-range chair that actually supports your spine will outperform an expensive one that doesn’t match your body type.
Desk height that actually fits your body
A desk is the right height when your elbows sit at roughly a 90-degree angle while typing, with shoulders relaxed rather than raised. For most adults using a standard desk, that lands somewhere between 28 and 30 inches, though taller or shorter frames will need adjustment.
Should you buy a standing desk?
A standing desk is worth it if you already sit for long, uninterrupted stretches and want an easy way to break that up. It’s not a magic fix for bad posture, and standing all day causes its own strain. The real benefit is variety — alternating between sitting and standing rather than staying locked in one position.
Simple posture adjustments that make an immediate difference
Small changes carry more weight than most people expect: keeping the top of the monitor at eye level, resting feet flat on the floor instead of tucked under the chair, and setting a reminder to stand up every hour. None of this requires new equipment — just attention.
Getting the ergonomics right solves the physical strain. The next layer is what your eyes deal with all day, which is just as easy to overlook.
Monitor and Lighting: Save Your Eyes Before They Start Hurting
Eye strain builds slowly, which is exactly why it goes unnoticed until it’s already a problem. Monitor position and lighting are two of the easiest fixes with the biggest payoff.
Monitor height
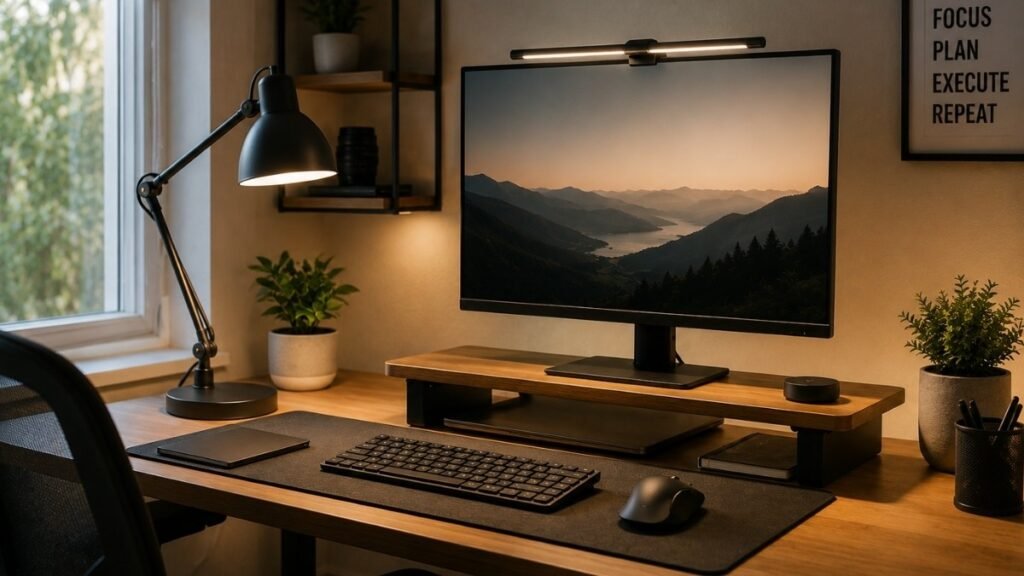
The top of the screen should sit at or just below eye level, about an arm’s length away. Anyone looking down at a laptop screen all day is putting unnecessary strain on the neck — a laptop stand paired with an external keyboard solves this cheaply.
Single vs dual monitors
A second monitor helps most with tasks that involve comparing documents, referencing data while writing, or juggling multiple apps at once. For simpler, single-focus work, one larger monitor is often plenty and keeps the desk less cluttered.
Natural light vs monitor light bars
Natural light is the better default when it’s available, but it’s inconsistent — bright at noon, gone by evening. A monitor light bar mounted above the screen fills that gap without adding glare to the display, which is a common complaint with traditional desk lamps aimed at the wrong angle.
Video call lighting that actually looks good
This is one of the most common frustrations people bring up after switching to remote work — showing up on a call looking like they’re sitting in a cave. The fix is usually simple: face a window or a soft light source rather than sitting with it behind you. A cheap ring light or key light placed slightly above eye level, angled down, solves most of the problem without any editing software.
Budget-Friendly Accessories That Actually Improve Productivity
Better typing comfort
A wrist rest and a keyboard with a lower profile reduce strain during long typing sessions. Mechanical keyboards feel great to some people and overwhelming to others — this comes down to personal preference more than performance.
Cleaner desk organization
A simple desktop tray or drawer organizer keeps small items like pens, sticky notes, and adapters from spreading across the whole surface. The goal isn’t a minimalist desk — it’s a desk where everything has an assigned spot.
Faster charging
A multi-port charging station near the desk eliminates the daily hunt for a free outlet. This matters more than it sounds like it would, especially for anyone juggling a phone, laptop, and accessories at once.
Noise reduction
Foam desk pads absorb some ambient noise, and a pair of decent noise-canceling headphones does more for focus in a shared household than almost any other single purchase.
Focus tools
A basic timer, a “do not disturb” light, or a closed-door policy during calls all do the same job in different forms — signaling to the rest of the household that a work block is in progress.
Accessories I Regret Buying
Not every popular accessory earns its place. Decorative desk mats that look nice but add no function, novelty desk toys that end up as clutter within a week, and overly complex cable organizers that are harder to use than the mess they were meant to fix are common regrets. The pattern with most of these purchases is the same: bought for how the desk would look in a photo, not for how it would function on a Tuesday afternoon.
Cable Management That Doesn’t Look Like a Spider Web
Most desk setups eventually hit the same wall — plenty of gear, no plan for where the cables go. It’s rarely dealt with until the tangle becomes genuinely annoying to work around.
Hide the power strip
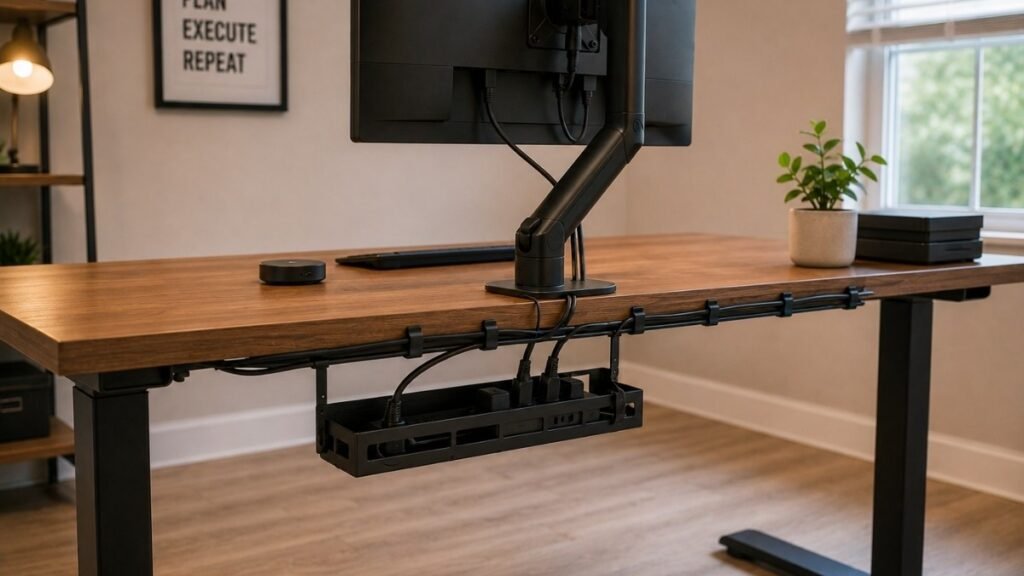
Mount it to the underside of the desk or tuck it into a small bin out of sight. A power strip sitting exposed on the floor is usually the first thing that makes a setup look unfinished.
Velcro vs cable clips
Velcro straps are better for cables that get unplugged and moved often, since they’re reusable without damaging the cord. Clips work well for permanent runs that never need to be adjusted, like a monitor cable running along the back of the desk.
Under-desk cable trays
A tray mounted beneath the desk keeps power strips and excess cable length off the floor entirely. This single addition solves more clutter than most other cable products combined.
Floating desk cable management
Floating desks create a specific challenge, since there’s no leg to run cables down. A cable sleeve or a small conduit that routes wires along the wall behind the desk to the nearest outlet is the most common solution, and it’s worth planning before mounting the desk rather than after.
How to keep cables hidden after future upgrades
Every new monitor, hub, or accessory adds another cable. Leaving a little slack in the original routing setup — rather than pulling everything tight — makes it much easier to add one more cord later without redoing the whole system. It’s common to spend a few hours getting cables organized once, and if the routing is done with room to grow, it rarely needs a full redo again.
Small Space? Here’s How to Build a Home Office Anyway
Not everyone has a spare room, and that’s not actually a dealbreaker. It just changes the priorities.
Bedroom corner
Position the desk facing away from the bed if possible — this makes it easier to mentally separate work hours from rest. A narrow corner desk and a wall-mounted shelf keep the footprint small without sacrificing storage.
Living room setup
The main challenge here is visual clutter for the rest of the household. A desk that closes up, or at minimum a tray to clear surface items at the end of the day, keeps the space usable for both work and downtime.
Shared family space
In a multi-use room, noise and interruptions matter more than desk size. Noise-canceling headphones and a clear signal — like a small light or sign — that work is in progress go a long way.
Apartment layouts
In smaller apartments, a fold-down desk or a slim console-style desk against an underused wall (like a hallway or the end of a kitchen counter) can create a workable setup without taking over the living area.
Making one room serve two purposes
The desk that closes, the drawer that hides supplies, and furniture that isn’t obviously “office equipment” all help a workspace blend into a room that has to do double duty. The goal is a setup that disappears when the workday ends, not one that dominates the room around the clock.
Running Two Computers Without Driving Yourself Crazy
This is a specific but genuinely common frustration — a work laptop and a personal or gaming PC that both need to share one desk setup.
Mac + Windows setup
Running both usually comes down to a shared monitor and a way to switch input sources. Most modern monitors support multiple inputs, so switching is often as simple as pressing a button on the monitor itself or using its remote.
KVM switch explained simply
A KVM switch lets one keyboard, monitor, and mouse control two different computers, switching between them with a button press or hotkey. It’s the simplest fix for anyone tired of unplugging and replugging cables every time they switch machines.
Multi-device keyboards
Many keyboards and mice now support pairing with two or three devices and switching between them with a dedicated button. This is often the easiest entry point before investing in a full KVM setup.
Monitor switching tips
Label the input sources in the monitor’s on-screen menu so switching doesn’t involve guessing between “HDMI 1” and “HDMI 2.” It’s a small detail, but it removes a surprising amount of daily friction.
Workflows That Keep Your Desk Clean Every Day
Hardware solves half the problem. What actually keeps a desk clean long-term is a repeatable routine, not a one-time cleanup.
Inbox tray
A single tray for anything that needs action — mail, receipts, notes — keeps loose paper from spreading across the desk. The rule is simple: if it’s not in the tray, it doesn’t belong on the desk.
Daily reset routine
Spending two minutes at the end of the day clearing the desk back to its baseline state makes the next morning’s start far easier. Skipping this even a few days in a row is usually how clutter creeps back in.
Paperless workflow
Scanning documents instead of stacking them, and canceling paper statements where possible, removes one of the most common sources of desk clutter before it starts.
Pomodoro layout
Keeping only the tools needed for the current task within reach during a focused work block — and putting everything else out of sight — reduces the temptation to multitask and keeps the desk visually calmer.
Weekly cable check
A five-minute check once a week to re-secure any cable that’s worked loose prevents the slow slide back toward tangled cords. This is far easier than a full cable overhaul every few months.
Three Budget Home Office Setups for Different Needs
| Setup | Best For | Key Purchases | What to Reuse |
|---|---|---|---|
| $200 Starter Setup | Anyone testing out remote work or short on space | Chair, monitor arm, cable kit | Existing desk, existing monitor |
| $500 Productivity Setup | Regular remote workers ready to upgrade daily comfort | Better monitor, desk lamp, keyboard | Existing chair (if adjustable), existing desk |
| $1000 Comfort Setup | Full-time remote workers investing long-term | Standing desk, premium chair, dual monitors | Accessories from earlier tiers |
The $200 tier focuses entirely on comfort essentials using furniture already on hand. The $500 tier adds the tools that improve daily focus and eye comfort. The $1000 tier is for anyone who has confirmed remote work is a long-term arrangement and wants a setup built to last, rather than one assembled piecemeal.
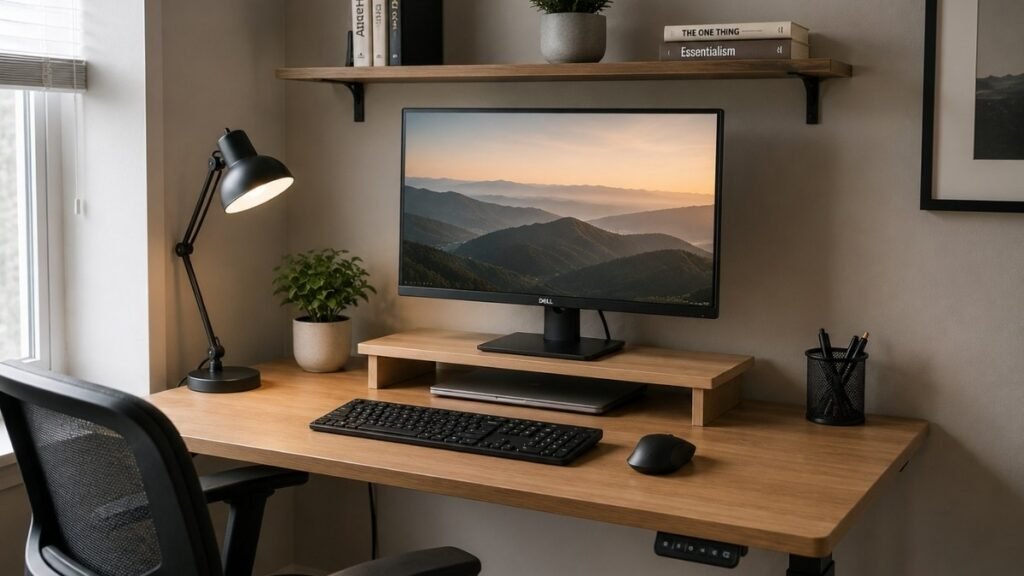
Home Office Setup Mistakes I Wish I Had Avoided
- Buying the biggest desk possible. A large desk sounds practical but often just gives clutter more room to spread.
- Buying cheap chairs twice. A budget chair that gets replaced within a year usually costs more in the end than a mid-range one bought right the first time.
- Ignoring cable management. Left alone, a small tangle turns into a genuinely frustrating mess within a few months.
- Placing the desk against the wrong wall. A desk facing a blank wall with a window at your back invites glare on video calls and a dull view the rest of the day.
- Buying aesthetic accessories before ergonomic essentials. A nice desk mat doesn’t fix a bad chair, but it’s often bought first anyway.
Real-Life Desk vs Instagram Desk
Instagram desk:
- Perfectly centered accessories
- No visible cables
- Empty, minimalist surface
Reality:
- A laptop, slightly off to one side
- A charger, a phone cable, maybe a second charging brick
- A coffee mug that’s been refilled twice
- An open notebook
- A pair of headphones draped over the monitor arm
A desk photographed for social media isn’t necessarily wrong, but it’s rarely how anyone actually works. A genuinely well-organized desk isn’t the one with the least stuff on it — it’s the one where every item has a fixed spot, so nothing ever has to be hunted for or shoved aside to make room for something else.
FAQ
What are the absolute essentials for a home office setup?
A supportive chair, a desk at the correct height, and a monitor positioned at eye level are the true essentials. Everything else — lighting, accessories, cable management — improves the experience but isn’t required to start working comfortably.
How can I build a productive home office on a small budget?
Start with the $200 tier: reuse existing furniture where possible and put the budget toward a supportive chair, a monitor arm, and basic cable management. These three items solve the most common sources of daily discomfort and clutter.
Is a standing desk really worth buying?
It’s worth it mainly for people who already sit for long stretches and want an easy way to alternate positions throughout the day. It isn’t a substitute for good posture or a properly fitted chair.
How do I hide cables on a desk without drilling holes?
Velcro straps, adhesive cable clips, and an under-desk tray handle most cable clutter without any permanent modification to the desk or wall.
What’s the best way to set up a home office in a small apartment?
Choose furniture that serves double duty — a fold-down desk, a console table, or a desk that closes up — and pick an underused wall, like a hallway or kitchen counter end, rather than trying to carve space out of a main living area.
How do I switch between a work laptop and a gaming PC easily?
A KVM switch is the most seamless option, letting one keyboard, mouse, and monitor control both machines with a button press. A multi-device keyboard and mouse combo is a simpler, cheaper alternative for lighter switching needs.
Where should I place my desk for the best lighting during video calls?
Face a window or another light source rather than sitting with it behind you, which causes the common “silhouette” look on calls. If natural light isn’t available, a small light positioned slightly above eye level and angled downward works just as well.
What home office accessories are actually worth buying first?
A supportive chair and a monitor arm or stand typically deliver the most noticeable improvement for the money. Items like decorative desk mats or novelty gadgets are worth considering only after these essentials are in place.
Final Thoughts
The best home office isn’t the most expensive one, and it isn’t the most photogenic one either. It’s the one that still feels comfortable in your body and clear in your mind after several hours at the desk — with a surface that stays functional rather than chaotic.
If the budget is limited, the smartest move is investing first in whatever affects your body and focus every single day, rather than trying to buy the “complete perfect desk” all at once. Needs change as work habits evolve, and upgrading gradually is almost always more practical — and more affordable — than trying to get everything right in one purchase.
🖥️ WorkDeskLab Notes: Why This Guide Takes a Different Approach
Building a better home office isn’t about filling your desk with expensive gear. It’s about creating a workspace that helps you feel comfortable, stay focused, and work without unnecessary friction.
That’s why this guide follows a simple order that many setup guides overlook:
- 🪑 Comfort First — Build around ergonomics before buying accessories.
- 💡 Optimize Your Environment — Improve lighting, monitor placement, and organization before adding more equipment.
- ⚙️ Upgrade With Purpose — Buy tools because they solve a real problem, not because they look good in someone else’s setup.
A productive workspace isn’t the one with the cleanest Instagram photo.
It’s the one that makes every workday a little easier than the last.
Continue Building Your Home Office
A great workspace isn’t built in a single afternoon. These guides can help you improve different parts of your setup over time:
- Desk Cable Management — How to Hide Every Wire Without Drilling a Single Hole
- Monitor Stand — Why Your Screen Is Too Low and How to Fix It for Good
- Floating Desk, Wall Mounted Desk, Fold Down Desk: Which Space-Saving Desk Is Actually Right for You
- Desk Organization Ideas That Actually Stick (Not Just for the First Week)
🖥️ A Final Note
A better workspace isn’t built all at once. It’s built through small improvements that make every workday more comfortable, organized, and productive.
At WorkDeskLab, we focus on practical solutions, real workspaces, and advice that stands up to everyday use—not just good-looking desk setups.
Our goal is simple: helping you build a workspace that helps you do your best work, every single day.