There’s a version of tired that’s hard to explain.
It’s not the tired from not sleeping enough — you know what that feels like. This is the tired that builds through a normal workday, that gets heavier around 2pm, that makes the last two hours feel like pushing through sand. You’re not hungry. You haven’t been up since 4am. You’re just… done, in a way that feels disproportionate to what you’ve actually done.
Bad lighting is one of the most common and most overlooked causes. Not dramatic bad lighting — not working in a dark room — but the subtle wrong: overhead fluorescent light hitting your screen from behind, creating low-grade glare that your eyes are constantly compensating for. A lamp positioned so it bounces off the screen rather than illuminating the surface. No front-facing light on your face during video calls, so the camera compensates by dimming everything, including you.
Your eyes are working harder than they should, all day, every day. The fatigue compounds. The monitor light bar and the desk lamp are the two tools that fix this — but they fix different parts of it, and most people don’t know which they actually need.
This guide explains the difference, when each one makes sense, and how to set either one up correctly.
— Daniel Shaw, 7 years working from home, one embarrassingly bad video call lighting situation before I finally dealt with it
Key Takeaways
- A monitor light bar illuminates the desk surface and keyboard without creating screen glare — it replaces the need for a traditional desk lamp in most setups
- A desk lamp provides broader, more flexible lighting including front-facing light for video calls — something a light bar alone cannot do
- Research from the Journal of Environmental Psychology found that workers with access to natural-spectrum (daylight) light reported significantly better mood, energy, and sleep quality than those under standard artificial lighting
- The most common home office lighting mistake: a light source directly behind the monitor creating glare, or a light source behind the worker bouncing off the screen — both cause sustained eye strain
- For most home offices, the ideal setup is both: a monitor light bar for task lighting on the desk, and a desk lamp positioned in front for video call lighting and general illumination
Home Office Lighting: Why Most Setups Get It Wrong
Office lighting problems almost always come from the same source: light in the wrong position relative to the screen. There are three common configurations, and two of them cause problems.
Light behind the monitor (from a window or lamp behind the screen): Creates glare on the monitor surface. Your eyes can’t fully resolve the contrast between the lit screen and the bright background, so they work harder continuously. Over eight hours, this accumulates into the afternoon fatigue that feels like a productivity problem but is actually a lighting problem.
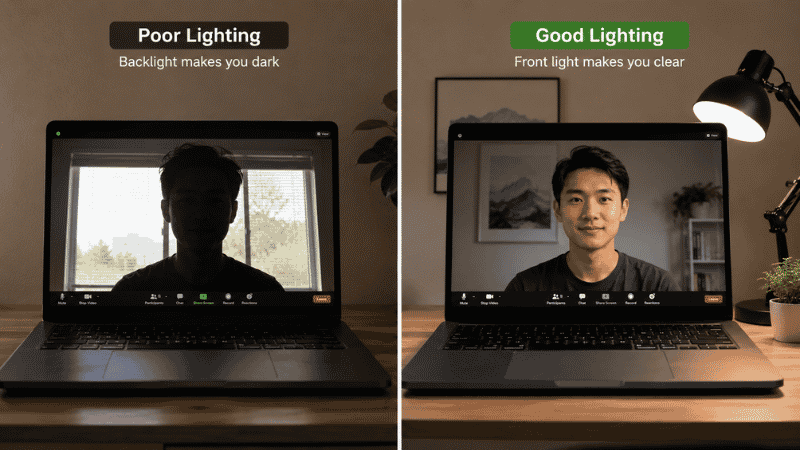
Light behind the worker (from a window or ceiling light behind you): Reflects off the screen surface into your eyes. Also creates the backlight problem on video calls — you appear as a dark silhouette against a bright background, which is why you look so dim on Zoom even in a well-lit room.
Light from the side or front: This is the correct configuration. Side light illuminates your workspace without hitting the screen directly. Front light (coming from in front of you, toward your face) illuminates you for calls and provides ambient light without screen interaction.
The monitor light bar and the right desk lamp are both tools for creating correct light positioning. They do it in different ways, for different purposes.
→ For desk position and light source placement in the room: Home Office Layout Guide.
What Is a Monitor Light Bar and What Does It Actually Do?
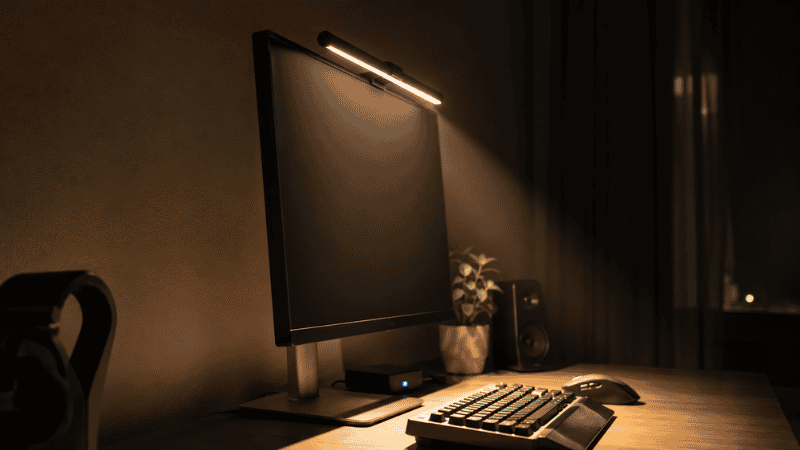
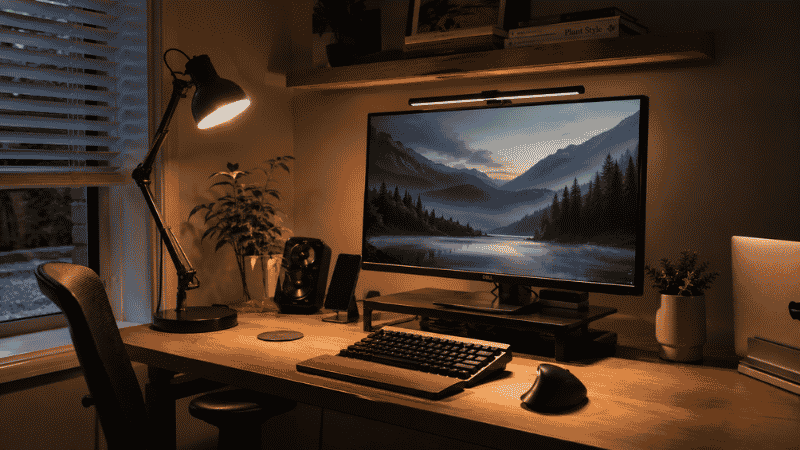
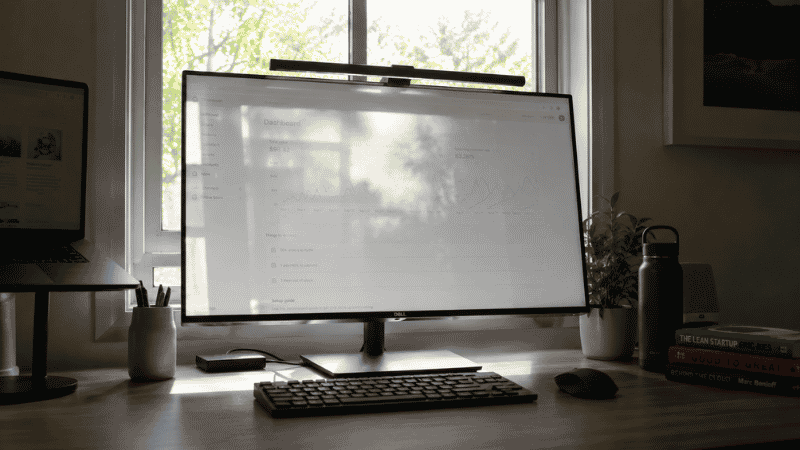
A monitor light bar is a long, narrow LED lamp that clips to the top edge of your monitor and shines light downward — onto the desk surface, the keyboard, and your documents. Unlike a desk lamp, it’s designed specifically to illuminate the work surface directly below the screen without casting light upward onto the screen itself.
This asymmetric lighting design is the key feature. Standard desk lamps cast light in multiple directions, including toward the screen. A monitor light bar is engineered to light only downward, which means you get a well-lit keyboard and desk surface without adding glare to the monitor.
The practical benefits:
- No screen glare from the light source itself
- Illuminates the keyboard directly beneath the monitor without a separate lamp
- Eliminates the need for a lamp on the desk, freeing up desk surface space
- Power typically comes from a USB port on the monitor — no separate power cable needed
- Sits on the monitor itself, so it takes up zero desk space
What a monitor light bar doesn’t do: light your face for video calls. The light goes downward, toward the desk surface. Your face — above the desk surface — isn’t illuminated by it. If you’re on video calls regularly, you’ll need a desk lamp positioned in front of you for that purpose, regardless of whether you also have a light bar.
Editor’s note: The monitor light bar is one of the more genuinely clever product categories of the last few years. It solves a specific problem — task lighting without screen glare — in a way that nothing else quite does. If you find yourself squinting at your keyboard in a darkened room or dealing with overhead light glare on your screen, this is worth trying before anything more complicated.
Monitor Light Bar vs Desk Lamp: Which One Do You Actually Need?
The honest answer is that most home offices benefit from both, doing different jobs. But if budget or space is a constraint and you’re choosing one, here’s the decision framework:
Choose a monitor light bar if:
- Your primary problem is keyboard and desk surface visibility in low ambient light
- You want to eliminate a desk lamp and reclaim that surface space
- Your video calls are fine and you don’t need dedicated face lighting
- You have a standard flat monitor (light bars aren’t compatible with curved monitors wider than most home office setups)
Choose a desk lamp if:
- You’re on video calls regularly and currently look dark or underlit on camera
- You want to adjust where the light falls across different areas of the desk
- Your room lacks ambient light and you need broader illumination beyond just the desk surface
- You work with physical documents or need light for tasks beyond the keyboard area
Use both if:
- You want the cleanest desk setup with the best ergonomic lighting
- You’re on regular video calls and do focused keyboard/document work
- You want to control the light environment precisely — the bar for task lighting, the lamp for ambient and call lighting
Desk Lamp for Home Office: What to Look For
Most desk lamp guides focus on aesthetics or lumen output. The factors that actually affect how you feel and perform at your desk are different.
Color Temperature: The Most Important Spec Most People Ignore
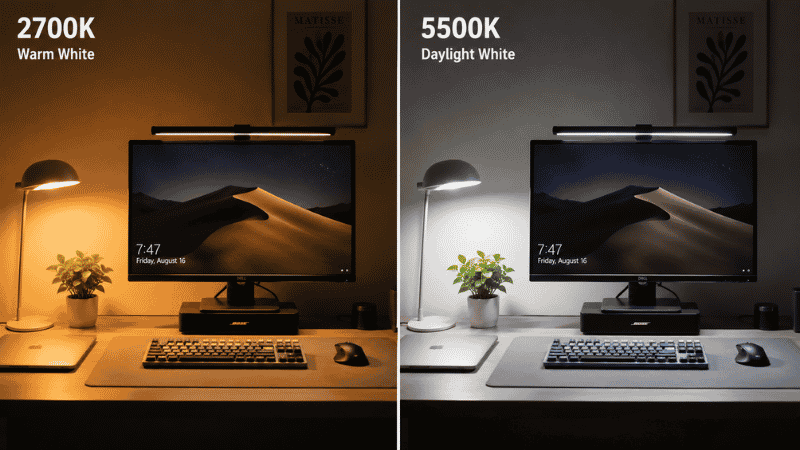
Color temperature is measured in Kelvin and describes whether light appears warm (orange-yellow, 2700–3000K) or cool (blue-white, 5000–6500K). This isn’t just aesthetic — it has a measurable effect on alertness and eye comfort.
Research published in the Journal of Environmental Psychology found that cool, daylight-spectrum light (around 5000–6500K) is associated with higher alertness, better mood, and improved cognitive performance during work hours. Warm light (2700–3000K) is associated with relaxation — which is why it’s good for evenings but counterproductive for afternoon work sessions.
A desk lamp with adjustable color temperature lets you dial in the right spectrum for different times of day and different tasks. This is worth prioritizing over style, brand, or even brightness level.
Daylight Desk Lamp
A daylight desk lamp specifically replicates the spectrum of natural sunlight — typically 5000–6500K with a high Color Rendering Index (CRI 90+). The high CRI means colors appear more accurate under the light, which reduces the subtle visual strain that comes from color distortion under standard LED or fluorescent sources.
If you work in a room with limited or no natural light, a daylight desk lamp is one of the highest-impact upgrades available. The effect on afternoon energy levels is noticed by most people within the first week of use.
Desk Lamp with USB Port
A lamp with one or two USB ports built into the base consolidates charging into the lamp itself — one less cable on the desk, one less item occupying desk surface or power strip. A minor feature in isolation, but it adds up when the goal is a clean desk with fewer visible items.
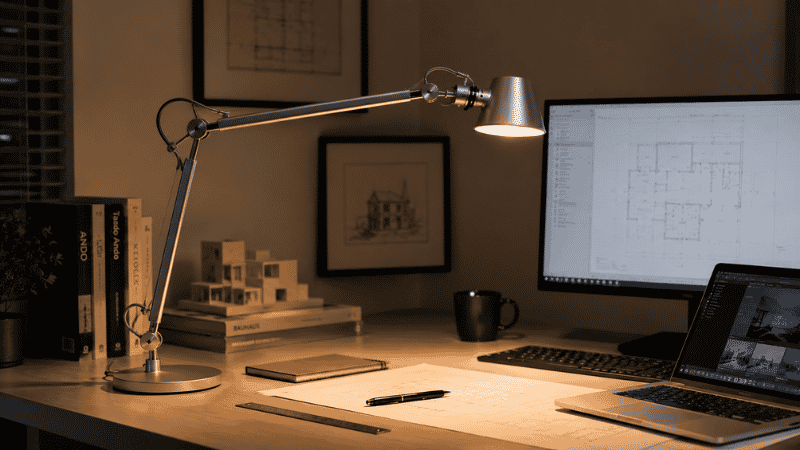
Architect Desk Lamp
An architect-style lamp (the articulated arm design with multiple pivot points) offers the most positional flexibility of any desk lamp form factor. You can position the light source precisely — directly in front of you for call lighting, to the side for ambient illumination, aimed at a specific document area for close work. The adjustability makes it the most versatile option for home offices where lighting needs change throughout the day.
Desk Lamp with Wireless Charging
Lamps with integrated wireless charging pads are practical if you charge a Qi-compatible phone at your desk regularly. The phone has a permanent charging spot on the lamp base; one less cable is needed on the desk. Worth the premium if wireless charging is part of your daily routine; not worth it if you’d rarely use the charging function.
How to Set Up a Monitor Light Bar Correctly
Installation is simple — the bar clips to the monitor top edge using a weighted counterbalance — but position and settings make a significant difference to how well it works.
Position: The bar should sit centered on the monitor’s top edge, tilted slightly forward (toward the desk) rather than straight out. Most bars have an adjustment range; aim the light at the keyboard and desk surface, not horizontally toward you.
Color temperature: Most light bars offer warm to cool adjustment. For work hours, cool to neutral (4000–5500K) is generally better for sustained alertness. Warm settings are comfortable for low-light ambient work but can feel sleepy during high-focus sessions.
Brightness: Start at roughly 50% brightness and adjust based on the ambient light in the room. A light bar that’s significantly brighter than the room creates contrast that the eyes have to constantly adjust to — this causes its own strain. Match the bar brightness to the overall room light level rather than maximizing it.
Compatibility check before buying: Light bars work best on flat monitors. Most curved monitors can accommodate a light bar, but check the maximum curvature specification in the product listing against your monitor’s curvature before ordering.
Video Call Lighting: The Problem a Light Bar Can’t Solve
If you look dark, underlit, or silhouetted on video calls, the problem is almost always the same: your primary light source is behind you (a window or ceiling light) rather than in front of you. The camera exposes for the bright background and your face ends up underexposed.
A monitor light bar won’t fix this because the light goes downward, not toward your face. The fix requires a front-facing light source — something illuminating your face from the front, not from above or behind.
The simplest solution: a desk lamp positioned in front of you, off to one side, aimed at your face. The lamp doesn’t need to be a ring light or a streaming light — any lamp with sufficient brightness and a reasonable color temperature will improve your call appearance significantly. Position it so the light hits your face from the front-left or front-right rather than straight on (which creates flat, shadowless lighting that can look unnatural).
Close your blinds or curtains during calls if there’s a window behind you — even a desk lamp in front of you can’t fully compensate for strong backlight from a window.
If You Only Have 10 Minutes to Improve Your Lighting Right Now
No purchases needed for this:
- Move any lamp currently behind your monitor to the side. Even moving it to either side of the desk — rather than directly behind the screen — eliminates a significant portion of screen glare immediately.
- If you have a window behind your monitor or directly behind you, close the blind or curtain during work hours and use artificial light instead. Natural light is excellent; natural light hitting your screen or camera background is a daily frustration.
- For your next video call: before joining, turn on a lamp positioned in front of you (even a phone flashlight pointed at the ceiling works as a test). Notice if your camera image improves. If it does significantly, front-facing light is your priority purchase.
Frequently Asked Questions
What is a monitor light bar?
A monitor light bar is a long LED light that clips to the top of a monitor and shines light downward onto the desk surface and keyboard. Unlike a desk lamp, it’s designed to illuminate only the area below the screen without casting light upward onto the screen itself — eliminating screen glare from the light source. It typically powers via USB from the monitor and takes up no desk surface space.
Monitor light bar vs desk lamp — which is better?
They do different jobs. A monitor light bar is better for task lighting (keyboard, desk surface) without screen glare. A desk lamp is better for broader room illumination and for video call face lighting. Most home offices benefit from both: the light bar for focused desk work, the lamp positioned in front for calls and ambient light. If you’re choosing one: a desk lamp is more versatile; a light bar is more specialized and space-efficient.
Do monitor light bars work with curved monitors?
Most light bars are compatible with curved monitors up to a certain curvature (usually 1500R or gentler curves). Ultra-wide monitors with aggressive curvature may not be compatible. Check the product’s compatibility specifications against your monitor’s curvature spec before purchasing — this information is usually in the monitor’s manual or manufacturer’s website.
What color temperature is best for a desk lamp for home office use?
For focused work during daytime hours: 4000–5500K (cool white to daylight). This spectrum supports alertness and reduces the mid-afternoon energy drop. For evenings or low-focus tasks: 2700–3000K (warm white) is more comfortable. An adjustable lamp that spans from warm to cool gives you both options. The single highest-impact lighting upgrade for most home offices is switching from warm white to daylight-spectrum light during work hours.
Why do I look dark on video calls?
Almost always because your primary light source is behind you — a window or ceiling light behind your position — rather than in front of you. The camera adjusts its exposure to the bright background, making your face appear underexposed and dark. The fix is a front-facing light source: a desk lamp positioned in front of you and slightly to one side, aimed at your face. Close any window blinds behind you during calls to reduce backlight competition.
Is an adjustable desk lamp worth it?
Yes, if lighting needs change throughout your day. An adjustable lamp lets you aim the light precisely — front-facing for calls, side-facing for ambient light, angled for document work. Fixed-position lamps provide consistent light in one direction but can’t adapt as your work changes. For home office use with varied tasks, adjustability is worth the modest price premium over fixed-position alternatives.
The Right Light Changes How the Day Feels
Good workspace lighting isn’t a luxury — it’s the infrastructure that lets you see clearly, stay focused, and not feel inexplicably exhausted at 3pm. A monitor light bar or a well-positioned desk lamp isn’t a dramatic upgrade. It’s a quiet one. The kind you notice most on the days you’re working without it.
Start with the free fix: move the light that’s currently behind your monitor to the side. Then decide whether your remaining lighting problem is task lighting (light bar), call lighting (desk lamp in front), or both.
More from WorkDeskLab:
- How to Set Up a Home Office That Actually Works
- Home Office Layout — Where to Put Your Desk and Light Sources
- Monitor Stand — Why Your Screen Is Too Low and How to Fix It
- Desk Organization Ideas — Systems That Actually Hold Up
References: Journal of Environmental Psychology — “Impact of Workplace Daylight Exposure on Sleep, Physical Activity, and Quality of Life” (2014) · American Optometric Association — Computer Vision Syndrome: Environmental lighting and display screen recommendations (aoa.org)