Your wrists have been trying to tell you something for a while now.
It starts as background noise — a faint ache at the end of a long day that you attribute to typing too much, or not taking enough breaks, or just getting older. Then it becomes a specific tenderness around the wrist joint that’s there when you wake up. Then you find yourself shaking out your hands between meetings without thinking about it.
The culprit, in most home office setups, isn’t how much you type. It’s where your keyboard is. Standard desk surfaces sit at a height designed for writing by hand — roughly 29 to 30 inches from the floor. That height works fine when your hand rests lightly on paper. It puts your wrists in a slightly extended, upward-bent position when you’re typing for eight hours a day. Over months and years, that angle accumulates.
A keyboard tray solves this by lowering the keyboard below the desk surface to a position where your wrists can stay flat or slightly negative-tilted while you type. The problem is that most guides jump straight to product recommendations without answering the questions people actually have: Do I really need one? Will it work with my desk? Which installation type won’t damage my furniture?
That’s what this guide covers.
— Daniel Shaw, 7 years working from home, one stubborn wrist issue that a keyboard tray fixed in two weeks
Key Takeaways
- Standard desk height (29–30 inches) places most people’s keyboards too high for neutral wrist positioning — this is a design problem, not a personal typing problem
- According to OSHA ergonomic guidelines, keyboards should be positioned so elbows are at approximately 90 degrees and wrists remain straight or slightly negative-tilted
- A keyboard tray is not necessary if your desk height can be adjusted, or if your chair can be raised high enough to bring your elbows to the correct angle
- Clamp-on keyboard trays require no drilling and are removable — the right choice for renters and anyone who might reconfigure their setup
- The biggest keyboard tray mistake is buying one that’s too narrow — it needs to fit both keyboard and mouse to actually work ergonomically
Do I Need a Keyboard Tray? The Honest Answer

Not everyone does. A keyboard tray solves a specific problem — keyboard positioned too high relative to your body — and if that’s not your problem, it won’t help you.
Here’s the two-minute self-test. Sit at your desk in your normal working position. Place your hands on the keyboard as if you’re about to type. Now look at your wrists: are they flat (neutral), slightly angled downward (negative tilt), or bent upward toward the screen (extended/positive tilt)?
If your wrists are flat or angled downward, your keyboard position is probably fine. You don’t need a tray.
If your wrists are bent upward — which is the case for most people at standard desk height — that extended position is what causes the cumulative strain. A keyboard tray that lowers and slightly tilts the keyboard away from you puts your wrists back into a neutral position.
Two other signals that a keyboard tray would help:
- You feel forearm or wrist fatigue that builds through the day and improves on weekends or days off from heavy typing
- Your shoulders are slightly raised or forward-reaching to reach the keyboard — meaning the keyboard is slightly too far away or too high, and your body is compensating
And two situations where a keyboard tray probably isn’t the answer:
- You have a height-adjustable desk — raise or lower the desk itself instead
- You can raise your chair high enough that your elbows reach 90 degrees with feet still supported — a footrest plus chair adjustment solves the same problem without hardware
Ergonomic Keyboard Tray: What the Research Actually Says

The ergonomic case for keyboard trays is well-established. OSHA’s ergonomic guidelines specifically address keyboard height as a primary risk factor for musculoskeletal disorders in office workers — the keyboard being too high is listed as a direct contributor to wrist and shoulder strain.
Cornell University’s ergonomics research adds useful specifics: the ideal keyboard height places your elbows at approximately 90 degrees, with the keyboard surface at or slightly below elbow height. For most people sitting in a chair set to proper height, this puts the keyboard at around 23–27 inches from the floor — which is 3 to 7 inches below the surface of a standard desk.
That gap is exactly what an under desk keyboard tray bridges.
The tilt angle matters too. Most people instinctively tilt their keyboards upward (positive tilt, legs raised at the back). Ergonomic research consistently recommends the opposite: negative tilt, with the back of the keyboard lower than the front. This keeps wrists in a straighter position during typing. A good adjustable keyboard tray lets you set negative tilt; a fixed tray on a flat surface does not.
Editor’s note: The research here is unusually consistent for ergonomics, which is a field full of conflicting advice. Keyboard height and tilt are two things the evidence agrees on clearly. If your wrists hurt and your keyboard is at desk height, lowering it is worth trying before anything else.
Types of Keyboard Tray: Which Installation Works for Your Desk
This is where most guides either skip the detail or bury it in product specs. Installation type matters because it determines whether the tray will work with your desk, whether it damages anything, and whether you can change your mind later.
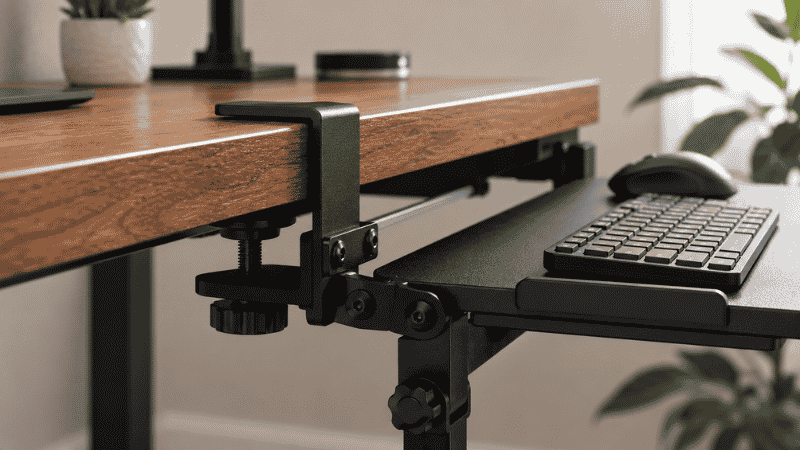
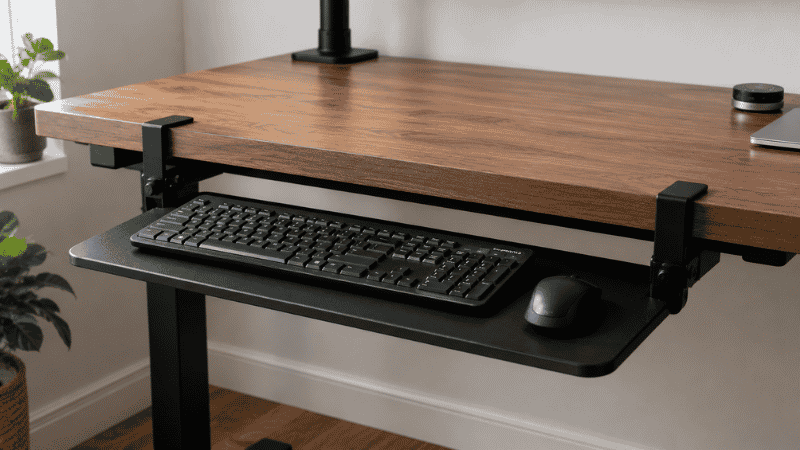
Clamp-On Keyboard Tray
The clamp mechanism grips the desk edge — the same way a clamp-mount cable tray or monitor arm attaches — without drilling. You tighten the clamp knob, the tray is fixed, and when you want to remove it, you loosen and slide it off.
This is the right choice for most home offices. No damage to the desk, fully reversible, repositionable. The tradeoff: clamp-on trays have a weight limit and can occasionally wobble more than screw-mounted options, though better models are stable enough for normal typing.
What to check before buying: your desk edge needs to have at least 1 inch of accessible edge thickness for the clamp to grip. Glass desks and very thin desktops may not be compatible — check the product specs for minimum/maximum desk thickness.
Pull Out Keyboard Tray (Screw-Mount)
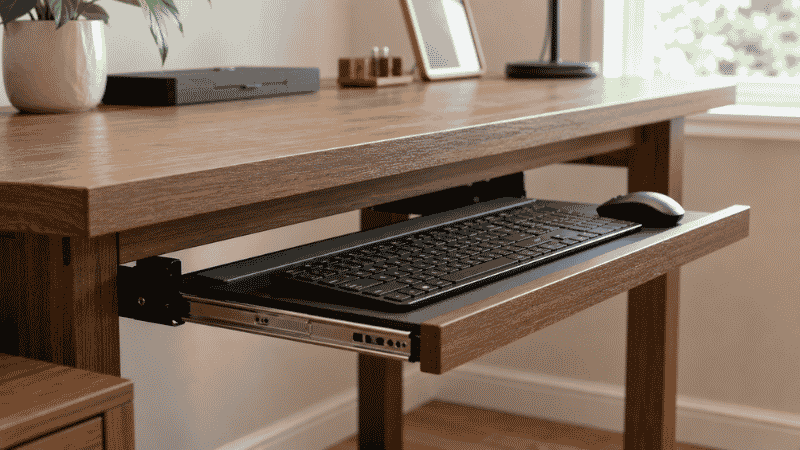
The traditional under desk keyboard tray slides on a track mounted to the underside of the desk with screws. It extends out when you need it and slides back under the desk when you don’t — which is useful for desks where you want to occasionally use the full surface.
More stable than clamp-on models, and the slide-back feature keeps the desk surface clear when the keyboard isn’t in use. The downside: it requires drilling into the underside of your desk. If you rent, if your desk is expensive, or if you ever want to remove it cleanly, this is a consideration.
The installation itself isn’t difficult — most people can do it with a drill and the included template in about 20 minutes. But it’s a commitment in a way that clamp-on isn’t.
Adhesive Mount Keyboard Tray
Smaller, lighter trays that attach to the desk underside with adhesive. Limited to keyboards only (no room for a mouse), lower weight capacity, and the adhesive has variable reliability depending on desk surface. These work for very specific use cases — a compact keyboard on a smooth-surfaced desk where you definitely won’t be reorganizing.
For most people, a clamp-on tray is more practical and more reliable. Adhesive mount is the last resort when clamp-on isn’t physically possible.
What to Look for in a Keyboard Tray for Desk Use
Before ordering anything, run through these four checks:
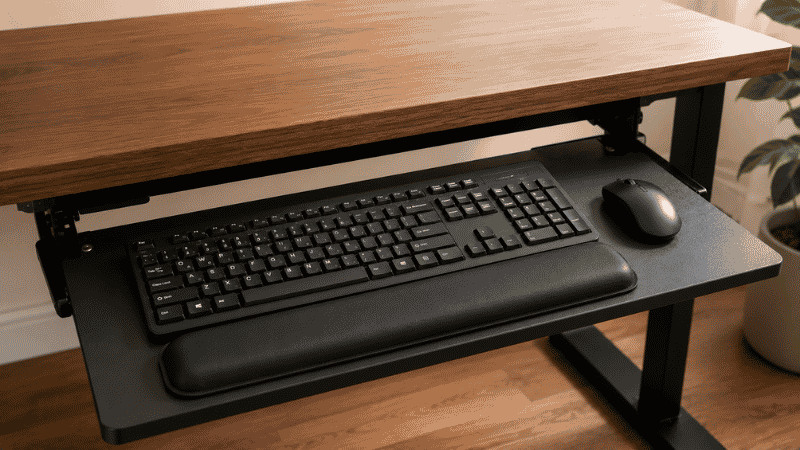
Size: does it fit your keyboard AND your mouse? This is the most common buying mistake. A tray sized for keyboard only means your mouse stays on the desk at a different height, which partially defeats the ergonomic purpose. Look for a platform at least 26 inches wide — enough for a full-size keyboard plus a mouse area to the right.
Adjustability: can it tilt negatively? A tray that only lies flat or tilts upward gives you part of the benefit. Look for a tray with adjustable tilt that includes negative tilt angle — usually described as “-15 to +15 degrees” or similar in the specs.
Height adjustment: how much range does it have? Fixed-height trays work if your desk-to-chair ratio happens to land in the right place. Adjustable-height trays (usually available on better clamp-on models) give you room to dial in the exact position that works for your body.
Clearance: will it fit under your desk? Measure the vertical distance from the floor to the underside of your desk, then subtract the tray height. You need enough clearance that the tray can slide out and open without hitting your thighs. Most people with standard 29-30 inch desks have enough clearance, but it’s worth confirming before buying a pull-out model with a track.
Keyboard Tray vs No Keyboard Tray: The Desk Space Equation
There’s a second reason people consider keyboard trays that has nothing to do with ergonomics: desk space.
A keyboard and mouse take up a significant portion of most desk surfaces — roughly 18 by 12 inches for a standard keyboard plus mouse area. Moving that setup below the desk surface instantly reclaims that space for a notebook, a second monitor, documents, or just clear working surface.
If desk space is your primary motivation (wrists feel fine, you just want more room), a pull-out keyboard drawer is worth considering specifically for this reason. It slides back under the desk completely when you’re not typing, giving you the full desk surface for other work.
The ergonomic benefit comes along for free — even if it wasn’t the reason you bought it, having the keyboard at a lower position is almost always better than having it at desk height.
Installing a Keyboard Tray: What to Expect
Clamp-on (15 minutes, no tools needed): Position the clamp at the desk edge where you want the tray, tighten the knob, attach the tray platform. Test stability by pressing down firmly — if it wobbles noticeably, tighten further or reposition the clamp. Most clamp-on trays also need the tilt angle set before use — do this before you start typing so you don’t need to readjust later.
Screw-mount pull-out (20-30 minutes, drill required): Use the included paper template to mark screw positions on the desk underside. Pre-drill pilot holes to avoid splitting the desk material. Attach the track, then attach the tray platform to the track. Slide out and test the range of motion. Most kits are designed so this is manageable as a solo job, though having a second person hold the template while you mark the holes makes it easier.
One thing both types have in common: the first few days feel slightly unfamiliar. Your body has adapted to the keyboard being at desk height. Give it a week before deciding whether the new position is working — initial adjustment discomfort is normal and different from the strain you’re trying to fix.
If You Only Have 10 Minutes to Improve Your Typing Position Right Now
Before buying anything, try this: raise your chair until your elbows are at roughly 90 degrees when your hands are on the keyboard. If your feet no longer reach the floor comfortably, support them with a footrest (a stack of books works temporarily). This mimics the effect of a keyboard tray without any hardware.
If that position feels noticeably better — wrists flatter, shoulders more relaxed — then a keyboard tray will give you the same result permanently without requiring you to sit at an unusual chair height.
If the chair adjustment doesn’t change how your wrists feel, the issue may be something other than keyboard height. Consider the keyboard angle (try negative tilt), the distance (keyboard too far from body causes reaching), or a wrist rest to support neutral position during pauses in typing.
Frequently Asked Questions
Are keyboard trays worth it?
For people who type for several hours daily at a standard-height desk and experience wrist, forearm, or shoulder discomfort, yes — a keyboard tray that properly lowers and tilts the keyboard addresses the root cause of the most common typing-related strain. For people who don’t experience discomfort or who have adjustable-height desks, the benefit is primarily desk space reclamation, which is still useful but less medically significant.
What is a keyboard drawer and how is it different from a keyboard tray?
The terms are often used interchangeably, but a keyboard drawer typically refers to a slide-out unit that pulls forward from under the desk on a track — similar to a desk drawer but positioned below the desktop. A keyboard tray is a broader term that includes clamp-on, adhesive, and drawer-style models. Functionally they solve the same problem; the difference is mainly installation method and whether the platform slides back under the desk when not in use.
Do I need to drill to install a keyboard tray?
No — clamp-on keyboard trays attach to the desk edge without any drilling and are fully removable. Pull-out drawer-style trays typically require drilling to mount the track to the desk underside. For renters or anyone who prefers not to modify their desk, clamp-on is the practical choice.
How wide should a keyboard tray be?
Wide enough to accommodate both your keyboard and your mouse — ideally at least 26 inches. A keyboard-only tray leaves the mouse at desk height, which creates a mismatch between keyboard and mouse positioning that can cause its own strain. Both input devices should be at the same height for the ergonomic benefit to work properly.
Does a keyboard tray help with carpal tunnel?
A keyboard tray can reduce the wrist extension that contributes to carpal tunnel pressure, but it’s one factor among several. If you’re experiencing symptoms of carpal tunnel syndrome — numbness, tingling, weakness in the hand — that’s a medical issue that warrants a conversation with a doctor or occupational therapist, not just an ergonomic accessory purchase. A keyboard tray may be part of a recommended workstation modification, but it’s not a substitute for professional assessment of an existing condition.
Can I use a keyboard tray with a standing desk?
Yes, but you’ll need a model with significant height adjustability, or one that tracks with the desk surface. When the desk is in standing position, the keyboard needs to be lower relative to the new desk height — most adjustable keyboard trays have enough range for this. Fixed-position trays designed for seated-height desks won’t work correctly in standing mode.
The Right Height Makes Everything Easier
A keyboard tray is a small intervention with a disproportionate effect. Most wrist and forearm strain from typing isn’t from typing itself — it’s from typing with your wrists bent upward for years, at a desk height that was never designed for keyboards in the first place.
Getting the keyboard to the right height, at the right angle, changes the equation. The discomfort that built up gradually tends to reduce gradually too — usually within a few weeks of consistent correct positioning.
Start with the self-test. If your wrists are extended at your keyboard, lower it. A clamp-on tray is the simplest way to do that without committing to permanent hardware.
More from WorkDeskLab:
- How to Set Up a Home Office That Actually Works
- Under Desk Storage — How to Use the Space You’re Wasting
- Desk Cable Management — Hide Every Wire Without Drilling
- Desk Organization Ideas That Actually Stick
References: OSHA — Computer Workstations eTool: Workstation Components — Keyboards (osha.gov) · Cornell University Ergonomics Web — Keyboard and mouse placement guidelines for neutral wrist positioning (ergo.human.cornell.edu)