The moment a monitor arm earns its place is very specific.
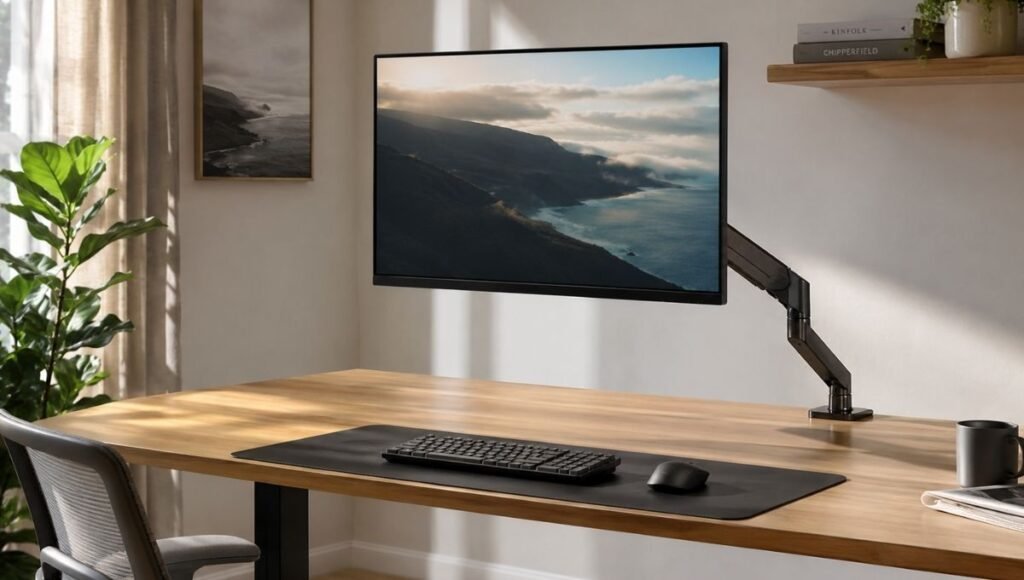
You pull the screen toward you to read something closely, then push it back. You tilt it slightly to reduce the glare from a window that moved with the afternoon sun. You swing it out of the way entirely when you need to spread papers across the desk. None of these things are possible with a monitor riser or a static stand — the monitor sits where it sits, and you adapt to it.
A monitor arm reverses that relationship. The screen comes to you instead of the other way around, and the desk surface underneath it is completely free. No riser footprint, no stand base, just desk — which turns out to be a surprisingly significant amount of space when it’s suddenly available.
But a monitor arm also has a higher barrier to purchase than a riser: it needs to be compatible with your desk edge, your monitor’s VESA pattern, and your monitor’s weight. Buy the wrong one and it either doesn’t fit or holds the monitor at the wrong angle for its weight. This guide covers what to check before buying, which type makes sense for your setup, and how the installation actually goes.
— Daniel Shaw, 7 years working from home, one monitor arm that changed how the desk feels to work at more than any other single purchase
Key Takeaways
- A monitor arm mounts to the desk edge or through a desk grommet and holds the monitor on an adjustable arm — freeing the desk surface completely and allowing height, depth, and angle adjustment on demand
- The three compatibility checks before buying: VESA mounting pattern on the monitor (75x75mm or 100x100mm), monitor weight vs arm weight capacity, and desk edge thickness for clamp mounting
- Gas spring monitor arms use a pressurized spring to support the monitor’s weight — the arm moves with one hand and holds position without tightening. They’re more expensive than friction arms but significantly better in daily use
- Cornell University ergonomics research confirms that monitors at incorrect height and distance are a leading cause of neck strain in office workers — a monitor arm addresses both variables simultaneously
- Dual monitor arms mount two screens on a single desk clamp — each arm adjusts independently, which is particularly useful when the two monitors are different sizes or need different angles
Monitor Arm vs Monitor Stand: When an Arm Is the Right Choice
A monitor riser or stand raises the screen to the right height and often provides storage underneath — and for most setups, that’s sufficient. A monitor arm is worth the additional cost and installation complexity when specific needs apply.
Choose a monitor arm when:
- You want the ability to adjust monitor position frequently — pulling it closer for detail work, pushing it back for video calls, swinging it aside for physical desk work
- You need the desk surface under and around the monitor completely free — no stand base, no riser platform
- You use a sit-stand desk and need the monitor height to change between seated and standing positions without manual adjustment
- You have two monitors and want both at consistent, independently adjustable heights
- You share a desk with someone of a different height and need quick position changes between users
Stick with a monitor stand or riser when:
- Your monitor position is fixed and you rarely need to adjust it
- The storage space under a riser is useful and you’d miss it
- Your desk edge is too thick, too thin, or made of glass — making clamp mounting impractical
- Budget is the primary consideration — a good riser costs $25–$60; a good monitor arm costs $60–$150+
→ Full guide: Monitor Stand — why your screen is probably too low and how a riser compares to an arm.
Monitor Arm Desk Mount: Clamp vs Grommet — Which Mounting Type
Before choosing a monitor arm, the mounting type needs to match your desk. Two options:
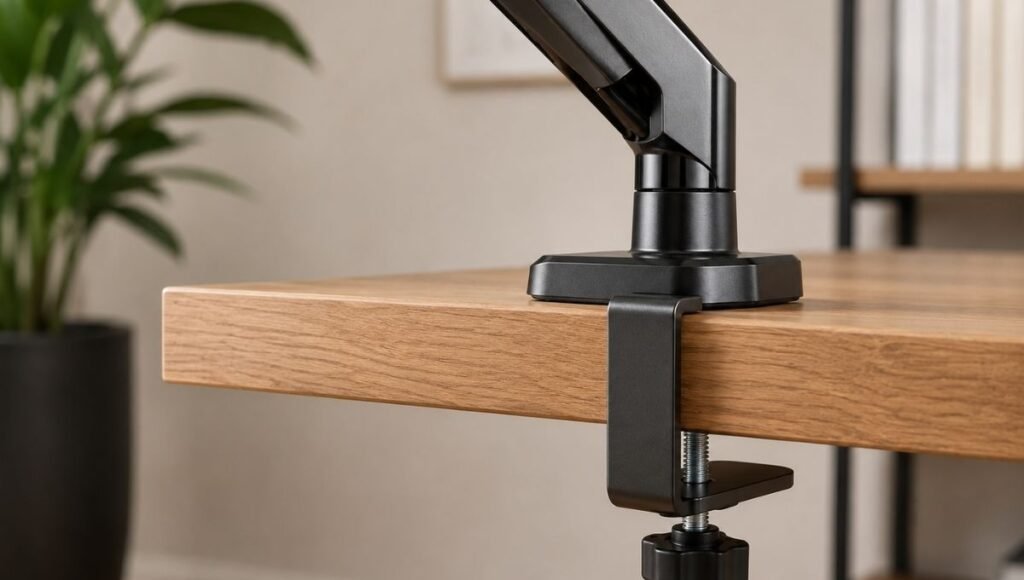
Clamp mount: The arm’s base clamps onto the desk edge — a threaded rod tightens under the desk surface to grip it from below. No drilling, fully reversible, installs in minutes. The limitation: the clamp needs a desk edge thickness between approximately 0.4 inches (1cm) and 3 inches (7.5cm). Very thin desks (some flat-pack desktops) or very thick desks (solid hardwood slabs) may fall outside this range. Check your desk edge thickness before ordering.
Grommet mount: The arm’s base passes through a hole in the desk — either an existing cable management grommet hole or a new hole drilled for the purpose. More permanent, more stable, and works on desks where the edge isn’t accessible or compatible with a clamp. Requires a hole of typically 2.5 to 3.5 inches in diameter. Desks with existing grommet holes (common on office desks) make this installation straightforward.
For most home office setups, clamp mount is the practical default — no drilling, easy installation, fully reversible. Grommet mount is worth considering if the desk has an existing hole or if clamp compatibility is uncertain.
Gas Spring Monitor Arm: Why It’s Worth the Extra Cost
Monitor arms come in two main mechanism types, and the difference in daily experience is significant enough to justify the price gap.
Friction arms: The arm’s joints have tension knobs that you tighten to hold the arm in position. To move the monitor, you loosen the knobs, reposition, and retighten. This works, but the multi-step process means you rarely adjust the monitor — you just leave it where it is. The “adjustable” benefit largely disappears in practice.
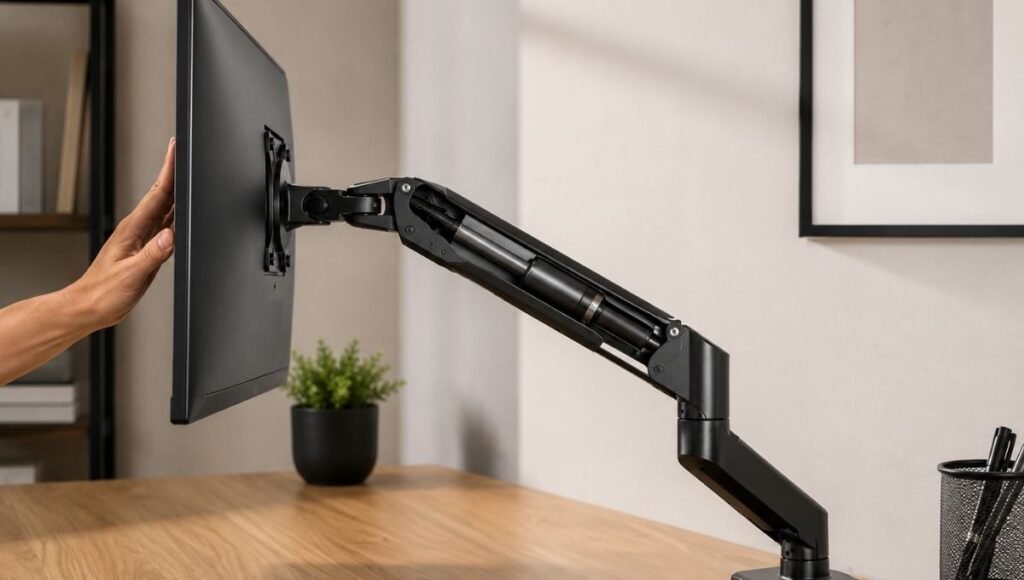
Gas spring arms: A pressurized cylinder supports the monitor’s weight, allowing the arm to move smoothly and hold position with one hand. Push the monitor up, it stays up. Pull it down, it stays down. Swing it to the side, it stays to the side. The adjustment is immediate and effortless — which means you actually use it.
The gas spring mechanism makes a monitor arm behave like a monitor arm is supposed to: responsive, intuitive, genuinely adjustable throughout the day rather than set-and-forget. For a purchase you’ll interact with dozens of times daily, the gas spring experience is worth the $30–$60 premium over a friction arm.
One practical note: gas spring arms are calibrated for a weight range. The spring tension is set for a specific monitor weight range (often listed as something like “4.4–19.8 lbs” or “2–9 kg”). If your monitor is near the bottom of that range, the arm may drift upward; near the top, it may droop. Most arms have a tension adjustment that compensates for this, but it’s worth confirming the arm’s range matches your monitor weight before buying.
Monitor Arm Clamp: Compatibility and Installation
The clamp is the part of the monitor arm that connects to the desk. Getting the clamp right is the most important pre-purchase check.
Desk edge thickness: Measure your desk edge — the distance from the desk top surface to the bottom of the desk. Standard desk edges are 0.75 to 1.5 inches thick. Most clamps handle this easily. Problems arise with:
- Very thin edges (under 0.5 inches) — common on some laminate desktops
- Very thick edges (over 3 inches) — common on solid wood or butcher block desktops
- Hollow edges — some desks have a thick-looking edge that’s hollow inside. A clamp on a hollow edge has nothing solid to grip and will fail under monitor weight
Desk edge profile: Beveled or curved desk edges can prevent some clamp designs from seating properly. Check that the clamp’s contact surface matches your desk edge shape.
Installation sequence: Position the clamp at the rear of the desk, typically 2–4 inches from the side edge. Tighten the clamp hand-tight first, then attach the arm and monitor, then verify position and tighten fully. Installing fully tight before adding the monitor makes final positioning harder.
Monitor Arm VESA Mount: Checking Monitor Compatibility
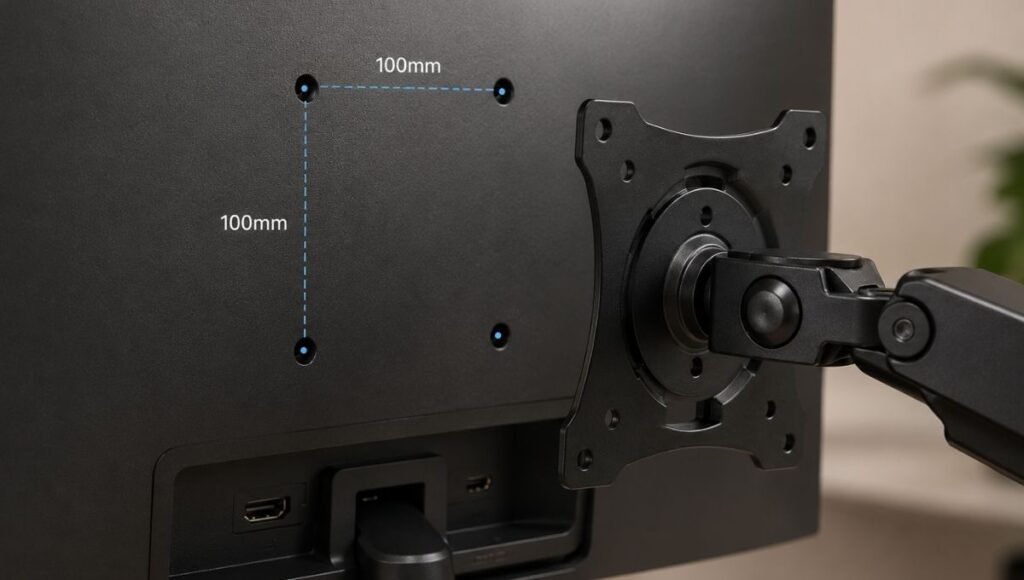
VESA is the standard mounting pattern on the back of most monitors — a grid of four mounting holes that the monitor arm’s head attaches to. The two common patterns are 75x75mm and 100x100mm (referring to the distance between the hole centers).
Check your monitor’s VESA compatibility before buying an arm:
- Look at the back of the monitor for four holes arranged in a square pattern
- Check the monitor’s spec sheet or manual — VESA compatibility is usually listed in the mounting specifications
- If the monitor has no VESA holes, VESA adapters exist for some monitor models, but this adds cost and complexity
Budget monitors occasionally lack VESA compatibility — this is the most common reason a monitor arm purchase fails. Confirm before ordering.
The arm’s head attaches to the VESA holes using four bolts. Most arms include hardware for both 75x75mm and 100x100mm patterns. The monitor’s own stand typically needs to be removed — check whether your monitor stand removal requires any tools before starting the installation.
Dual Monitor Arm: Setting Up Two Screens Correctly
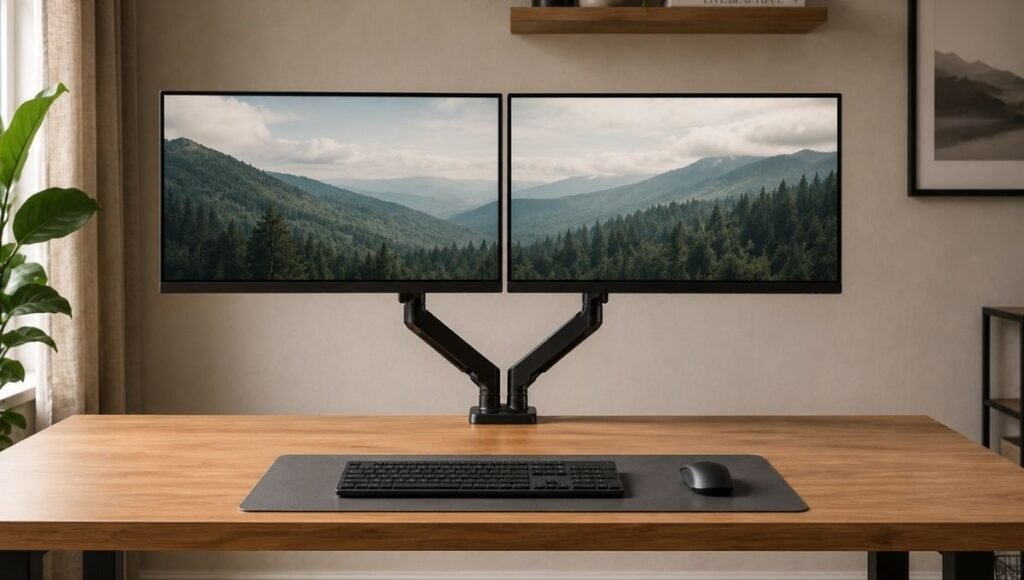
A dual monitor arm mounts two screens on a single desk clamp or grommet, each on its own independently adjustable arm. The arrangement is significantly cleaner than two separate stands or risers — one mounting point, both screens at consistent height, the desk surface under both monitors completely free.
The configuration decisions for dual arms:
Side-by-side vs stacked: Most home office dual setups use side-by-side — both monitors at the same height, one primary and one secondary. Stacked configurations (one monitor above the other) are less common but work well for coding or reference workflows where vertical information display is useful.
Primary monitor positioning: The primary monitor should sit directly in front of you — not angled, not offset. The secondary monitor sits to the side and can be angled slightly toward you. A dual arm with independent adjustment allows each screen to be positioned exactly where it works, rather than being forced to match each other’s height and angle.
Monitor size matching: Dual arms work with different-sized monitors, but having both at the same height with different-sized screens creates a visual misalignment (the top edges are at different heights if the screens are different sizes). Matching screen sizes creates a more visually coherent setup.
Heavy Duty Monitor Arm: When Standard Arms Aren’t Enough
Standard monitor arms handle monitors up to approximately 17–20 lbs (8–9 kg). Large monitors (32 inches and above) and ultra-wide monitors frequently exceed this weight. A standard arm with an overweight monitor will droop — the gas spring can’t hold the position, or the friction arm slowly drifts down throughout the day.
Heavy duty monitor arms are rated for higher weights — typically 20–33 lbs (9–15 kg) — with stronger gas springs or friction mechanisms. If your monitor is a large format or ultra-wide model, check its weight against the arm’s weight rating before ordering. The monitor’s weight is listed in its specifications, usually in the “physical specifications” section of the manufacturer’s page.
Ultrawide Monitor Arm
Ultra-wide monitors (21:9 or wider aspect ratio) have specific considerations beyond weight: the wider form factor affects how the arm balances the load. A standard arm mounting in the center of a 34-inch ultra-wide is balanced differently than a 27-inch standard monitor. Look for arms specifically rated for ultra-wide use, or heavy-duty arms with a higher weight capacity and wider tilt range that accommodates the wider panel.
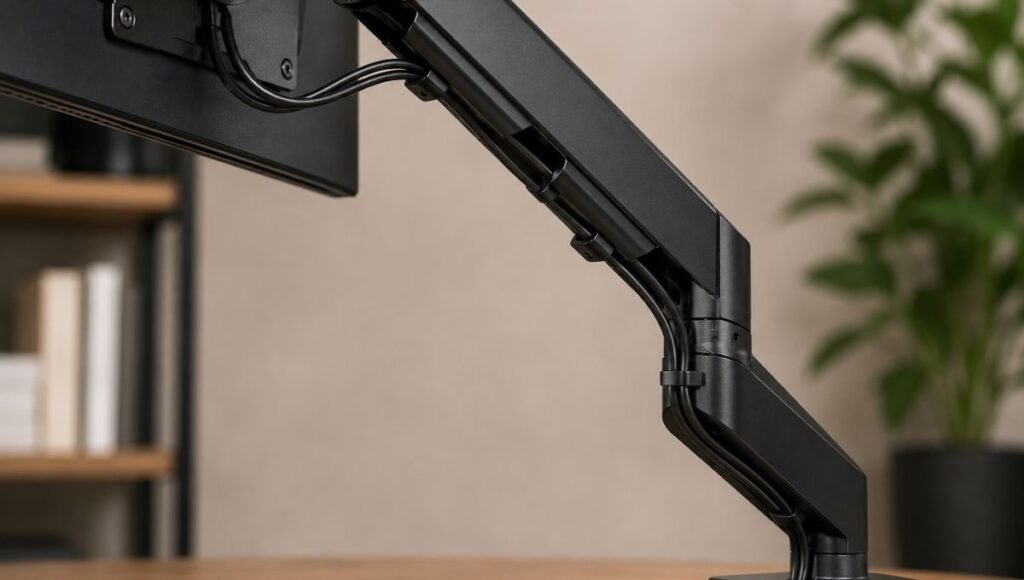
Monitor Arm Cable Management
One underappreciated benefit of a monitor arm: the arm structure provides a natural cable routing channel. Most monitor arms have a cable management system built in — clips, channels, or slots along the arm that route the monitor’s display and power cables from the monitor head down the arm and out at the desk mount, keeping them contained rather than hanging freely.
In practice, clean cable management on a monitor arm looks like this: the monitor’s cables run along the underside of the arm in the routing channel, exit cleanly at the desk mount point, and connect to the rest of the cable system from there. From the front, no cables are visible at all.
This is one of the largest visual improvements a monitor arm provides over a riser — not just the elevated screen and freed desk surface, but the complete elimination of visible monitor cables. → For routing all the other desk cables: Desk Cable Management Guide.
If You Only Have 10 Minutes to Check Compatibility Right Now
Before deciding whether to buy a monitor arm:
- Look at the back of your monitor — do you see four bolt holes in a square pattern? If yes, VESA compatible. If no, check the spec sheet.
- Measure your desk edge thickness. If it’s between 0.5 and 3 inches and solid, a clamp mount works.
- Weigh your monitor (or find the weight in the specs). If it’s under 17 lbs, standard arms work. If it’s 17–30 lbs, look for heavy-duty arms.
All three check out? A monitor arm will fit your setup. Any one of them is uncertain? Resolve it before ordering, not after.
Frequently Asked Questions
What is a monitor arm?
A monitor arm is a mounting system that attaches to the desk and holds the monitor on an adjustable arm rather than a fixed stand. The arm allows height, depth, tilt, and angle adjustment — you can position the screen exactly where you need it and change that position throughout the day with minimal effort. The monitor’s original stand is removed; the arm takes its place, usually with a much smaller footprint and the ability to swing the monitor out of the way when not in use.
Is a monitor arm worth it?
For most home office setups, a monitor riser is sufficient and costs less. A monitor arm is worth the additional investment when you genuinely need positional flexibility — for sit-stand desks, shared workspaces, dual monitor setups, or workflows that involve frequently changing the monitor’s position throughout the day. The freed desk surface is a real benefit, but if you’d never move a riser once it’s positioned, you’d also never adjust an arm.
How do I know if my monitor is compatible with a monitor arm?
Check for VESA mounting holes on the back of the monitor — four holes in a square pattern (75x75mm or 100x100mm). Most monitors made in the last decade have VESA compatibility. Check the monitor’s weight against the arm’s weight rating. If both check out, the monitor is compatible. The arm’s mounting head typically includes hardware for both common VESA patterns.
Can a monitor arm damage my desk?
A properly installed clamp mount doesn’t damage the desk — it grips the edge without screws or adhesive. Some clamping can leave minor pressure marks on very soft wood edges; adding a small rubber pad between clamp and desk surface prevents this. Grommet mounts require a hole, which is permanent. For glass desks, neither clamp nor grommet is typically safe — check the desk manufacturer’s mounting recommendations.
What is a gas spring monitor arm?
A gas spring monitor arm uses a pressurized cylinder to support the monitor’s weight, allowing the arm to move and hold position with minimal effort. Unlike friction arms (which require tightening knobs to hold position), a gas spring arm moves with one hand and stays where you put it. This makes the arm genuinely easy to adjust throughout the day, which is the key benefit of a monitor arm over a fixed riser. Gas spring arms cost more than friction arms but are significantly better in daily use.
Position the Screen Where It Needs to Be
A monitor arm makes the monitor responsive to you rather than fixed in one position you adapt to. The desk surface under it clears completely. The cables disappear into the arm’s routing channels. The height changes with one hand when you move from sitting to standing.
The three compatibility checks — VESA holes, monitor weight, desk edge — take five minutes and determine whether an arm will actually work for your setup. Get those right, choose a gas spring mechanism, and the rest of the setup is twenty minutes of installation.
More from WorkDeskLab:
- Monitor Stand — why your screen is probably too low and which solution fits your setup
- Desk Setup Guide — how to build a workspace that actually works
- Desk Cable Management — hide every wire without drilling
- How to Set Up a Home Office That Actually Works
References: Cornell University Human Factors and Ergonomics Research — Monitor positioning and neck strain in office workers: height, distance, and angle guidelines (ergo.human.cornell.edu) · OSHA — Computer Workstations eTool: Monitor positioning standards for ergonomic workstations (osha.gov)
WorkDeskLab is reader-supported. If we recommend a product, we may earn a small affiliate commission at no extra cost to you. This never influences what we recommend. See our Affiliate Disclosure for details.