Most desk setup guides give you a list of things to buy. This one works differently.
The problem with the list approach is that it skips the part that actually determines whether a desk setup works: the order. You can have a monitor stand, a cable management tray, a wrist rest, and a headphone stand — all good purchases individually — and still end up with a desk that feels cluttered and frustrating because the sequence was wrong. The cable management went in after everything else was already positioned, so the cables are still a mess under the desk. The monitor height was set before the chair was adjusted, so the ergonomics are off. The accessories were bought before the organizational system was established, so they have nowhere to live.
A desk setup that holds up isn’t the result of buying the right things. It’s the result of making decisions in the right order, with each layer building on the one before it.
This guide covers that sequence — from the foundational decisions that everything else depends on, through the ergonomic hardware that affects how your body feels at the end of the day, to the organizational layer that determines whether the desk stays functional over months rather than weeks.
— Daniel Shaw, 7 years working from home, three desk setups built from scratch, and one very clear understanding of what order things should go in
Key Takeaways
- A functional desk setup is built in layers: position and lighting first, ergonomic hardware second, organization and accessories third — reversing this order creates problems that are difficult to fix later
- According to OSHA, proper ergonomic workstation setup can reduce musculoskeletal disorder risk by up to 60% — the monitor, keyboard, and seating positions are the highest-leverage adjustments
- The most common desk setup mistake: buying accessories before the ergonomic foundation is correct, then discovering the accessories conflict with the positions that actually work
- A complete, functional ergonomic desk setup can be built for under $400 in accessories — the priority order matters more than the budget
- Cable management is the last ergonomic decision and the first aesthetic one — get it right and the setup looks intentional; skip it and no amount of accessories will make the desk look organized
Layer One: Position and Lighting (Do This Before Buying Anything)
The decisions in this layer cost nothing and determine whether everything you buy afterward actually works. Most people skip this layer entirely and wonder why their expensive setup still feels wrong.
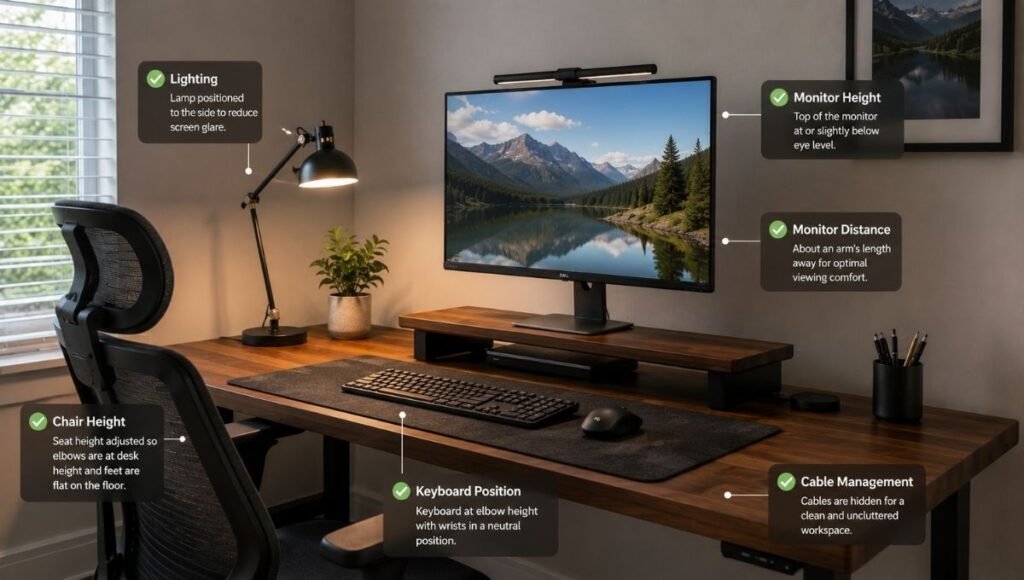
Desk position in the room. Where the desk sits relative to windows and doorways affects natural light (which determines whether you get glare on the screen or useful side light), background on video calls, and the psychological separation between work and non-work space. The right position: facing a wall or neutral surface, with a window to the side rather than behind the monitor. Five minutes moving the desk before buying anything is worth more than any accessory. → Full guide: Home Office Layout — how to place your desk for focus and better days.
Chair height relative to desk. Before setting monitor height, keyboard position, or footrest, the chair needs to be at the right height for the desk. Sit with your forearms roughly parallel to the floor when your hands are on the keyboard or desk surface. This height is the reference point for everything else — monitor height, footrest height, and keyboard tray position all derive from it.
Lighting direction. The primary light source should come from the side — not from behind the monitor (causes glare) and not from behind you (reflects off the screen and makes you look dark on video calls). If you can’t reposition a window, a desk lamp positioned to the side and front provides controllable directional light.
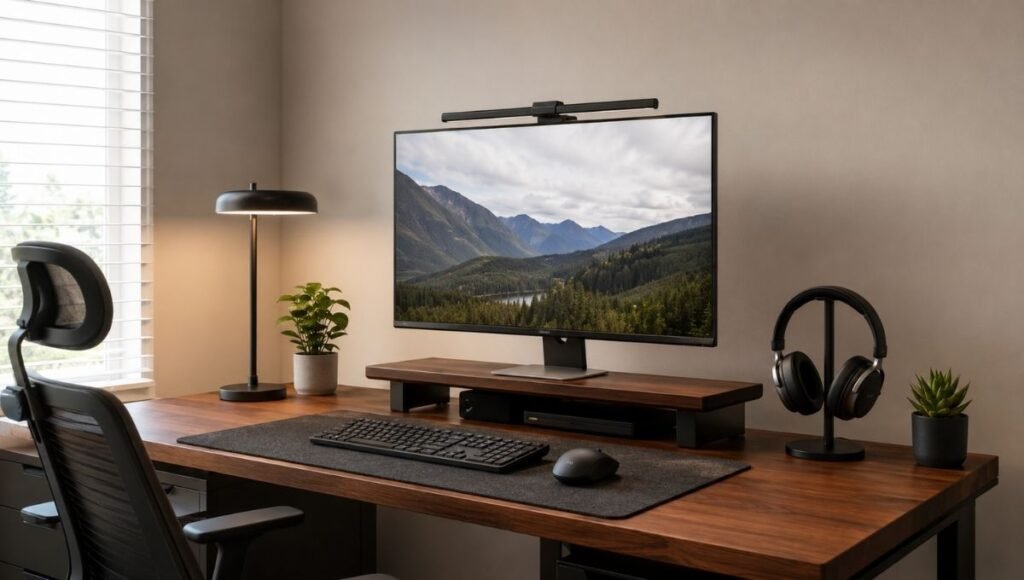
Layer Two: Ergonomic Hardware (The Decisions That Affect How You Feel)
This is where the physical setup takes shape. Each item in this layer has a specific ergonomic function — and a specific order in which it should be configured.
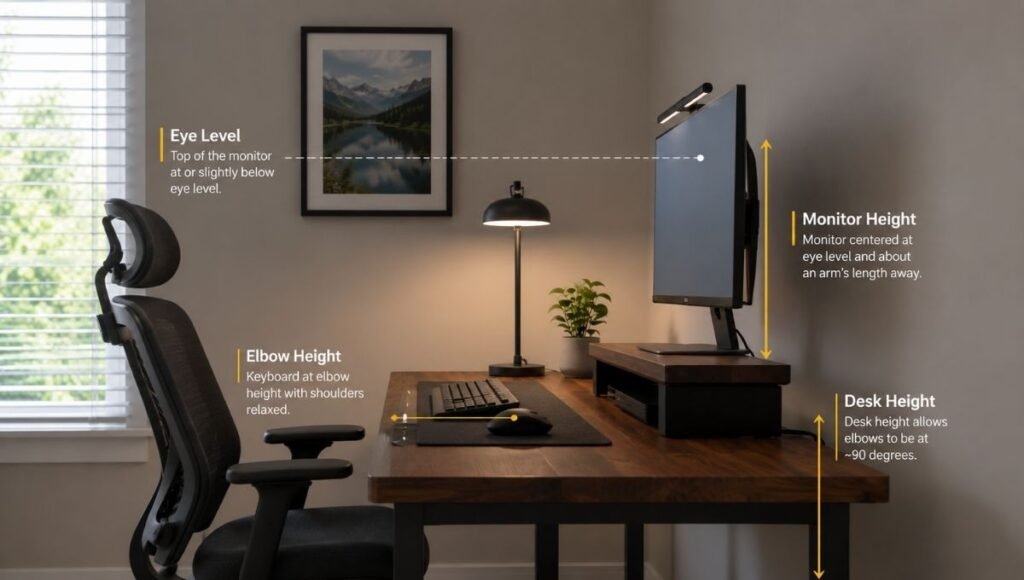
Step 1: Monitor or Screen Height
The monitor is the starting point for the ergonomic setup because everything else — keyboard position, chair height, footrest need — can be checked against it once it’s correct.
The target: the top of the monitor screen at or just below eye level when you’re sitting in your normal working position. For most people at a standard desk, this requires raising the monitor 3 to 6 inches above the desk surface. A monitor on the bare desk surface is almost always too low — the forward head tilt this creates is the primary driver of neck and upper back strain in desk workers.
Options: a fixed monitor riser (simplest, most stable, often includes storage underneath), an adjustable monitor stand, or a monitor arm for full positional flexibility. → Full guide: Monitor Stand — why your screen is probably too low and how to fix it.
For laptop users: a laptop stand raises the screen to eye level but requires an external keyboard and mouse — the built-in keyboard ends up too high to type on comfortably when the screen is at the right height. → Full guide: Laptop Stand for Desk — which type works and what to pair it with.
Step 2: Keyboard and Mouse Position
Once the monitor is at the right height, the keyboard and mouse position follows. The target: forearms roughly parallel to the floor, elbows at approximately 90 degrees, wrists neutral or slightly downward — not bent upward toward the keys.
For most setups at a standard desk height, the keyboard on the desk surface places the elbows at roughly the right angle. For setups where the desk is too high (common in shared spaces or when using a desk not designed for typing), a keyboard tray mounted below the desk surface brings the keyboard to the correct height. → Full guide: Keyboard Tray — do you actually need one and which type works.
Wrist rests address a specific part of keyboard ergonomics: supporting the wrists and palms during pauses between typing bursts. They’re for resting during breaks, not for resting while actively typing — a distinction that matters for whether they help or create additional strain. → Full guide: Wrist Rest — do you need one and which type works.
Step 3: Foot Support
After the chair height is set for the desk and keyboard, check your feet: are they resting flat on the floor with thighs approximately parallel to the floor? If not — if the feet are dangling slightly or pressing awkwardly — a footrest fills the gap. This is more common than most setups acknowledge, particularly for shorter users or at desks that are slightly higher than standard. → Full guide: Footrest — do you actually need one and which type makes a real difference.
Step 4: Desk Surface — The Mat
A desk mat unifies the working surface visually and functionally. It provides a consistent surface for mouse tracking, keeps the keyboard from sliding, protects the desk, and creates a defined work zone that makes the desk feel more intentional. Install it after the monitor and keyboard positions are confirmed — the mat should sit under the keyboard and mouse area, not under the monitor riser or other fixed items.
Size matters: the mat should cover the keyboard, mouse area, and any writing space side by side. For most desks this means at least 31 inches wide. → Full guide: Desk Mat — size, material, and whether you actually need one.
Step 5: Lighting
With the monitor at the right height and the desk surface established, lighting can be finalized. Two distinct lighting needs for a desk setup:
Task lighting — illuminating the keyboard and desk surface without screen glare. A monitor light bar clips to the top of the monitor and shines light downward asymmetrically, providing task lighting without any upward scatter that would cause glare on the screen.
Video call lighting — illuminating your face from the front for calls. This requires a lamp positioned in front of you, not above or behind. A desk lamp with adjustable color temperature positioned to the side and slightly forward provides both ambient light and call-quality face lighting. → Full guide: Monitor Light Bar and Desk Lamp — how to actually fix your workspace lighting.
Step 6: Connectivity
Modern laptops and many desktops don’t have enough ports for a complete desk setup: monitor, keyboard, mouse, webcam, external drive, phone charging, ethernet. A USB hub or docking station connects everything through a single cable, eliminating the daily plug-and-unplug friction of a multi-cable connection routine.
The docking station is the cleanest solution for a permanent desk setup — one cable connects the laptop to everything, and one cable disconnects it completely when you leave. → Full guide: USB Hub and Docking Station — how to stop running out of ports.
Layer Three: Organization (The Decisions That Keep It Working)
The ergonomic setup makes the desk comfortable to use. The organizational layer makes it stay functional over weeks and months rather than reverting to chaos.
Cable Management
Cable management is the single highest-impact change for how a desk looks and feels, and it’s the one most people do last — or not at all. The visible cables from a monitor, keyboard, lamp, USB hub, and phone charger, running in multiple directions to a power strip on the floor, make any desk look chaotic regardless of how well organized everything else is.
The system: adhesive cable clips route cables along the back edge of the desk. A cable sleeve bundles the desk-to-floor drop. A cable management tray mounts under the desk and holds the power strip completely off the floor. The result is a desk where no cables are visible from the front. → Full guide: Desk Cable Management — how to hide every wire without drilling. → Full guide: Cable Tray — how to choose, install, and keep it working.
Peripheral Storage
Headphones on the desk surface take up a footprint the size of a large notebook and add visual clutter even when everything else is organized. A headphone stand gives them a permanent position — on the desk at a corner, under the desk on a hook, or on the wall beside it. → Full guide: Headphone Stand — which type works for your desk.
Desk Surface Organization
A desk surface stays organized when every daily-use item has a specific, easy-to-return-to position. The items that earn a permanent desk surface spot: the keyboard and mouse (positioned for use), one pen, a phone (in a stand or on a charging pad), a notebook if used daily. Everything else — reference materials, supplies, secondary items — needs storage elsewhere: drawers, shelves above the desk, or under-desk storage. → Full guide: Desk Organization Ideas — systems that actually hold up.
Accessories
Accessories should be bought after the organizational system is in place, not before. The question for each potential purchase: does this solve a specific problem I actually have? A desk accessory that solves a real problem earns its place. An accessory bought speculatively ends up in a drawer within two months. → Full guide: Desk Accessories — what’s worth buying and what you’ll never use.
Ergonomic Desk Setup: The Quick Reference Checklist
Use this to audit an existing setup or build a new one:
- ☐ Desk positioned with window to the side, not behind the monitor
- ☐ Chair height set so forearms are parallel to floor with hands on keyboard
- ☐ Monitor top edge at or just below eye level (usually requires a riser)
- ☐ Monitor approximately arm’s length away (20–28 inches from face)
- ☐ Keyboard at elbow height with wrists neutral or slightly down
- ☐ Feet flat on floor or footrest — not dangling or tucked under chair
- ☐ Desk mat covering keyboard and mouse area
- ☐ Primary light source from the side — not behind monitor or behind you
- ☐ Front-facing light for video calls
- ☐ All ports connected without daily cable-swapping (USB hub or dock)
- ☐ Cables routed along desk edge and power strip off the floor
- ☐ Headphones with a dedicated position (stand or hook)
- ☐ Desk surface has a defined spot for each daily-use item
Dual Monitor Desk Setup: Additional Considerations
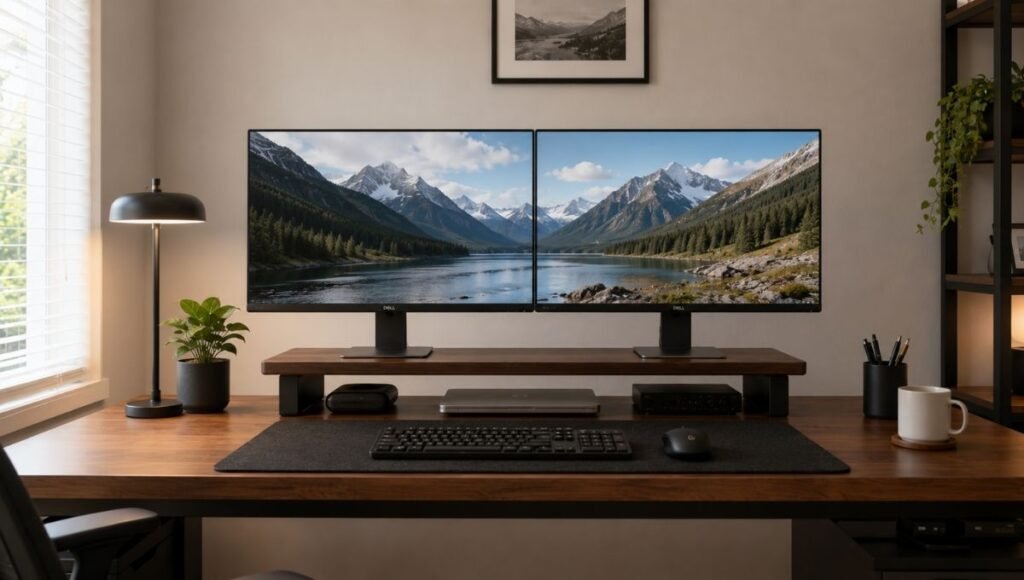
Dual monitor setups add one ergonomic complication: which screen is primary. The primary monitor — the one you look at most — should be directly in front of you at the correct eye level. The secondary monitor sits to the side at the same height, angled slightly toward you.
Both monitors need to be at the same height — mismatched monitor heights are a common source of neck strain in dual setups. A dual monitor stand or a wide riser that accommodates both screens at consistent height solves this. The area under both monitors becomes significant storage space once they’re elevated.
Cable management in dual setups is twice the challenge and twice the reward when done correctly. Both monitor cables, the keyboard, mouse, and peripheral cables all need routing — a cable tray under the desk is particularly useful in dual-monitor setups because the cable volume is higher.
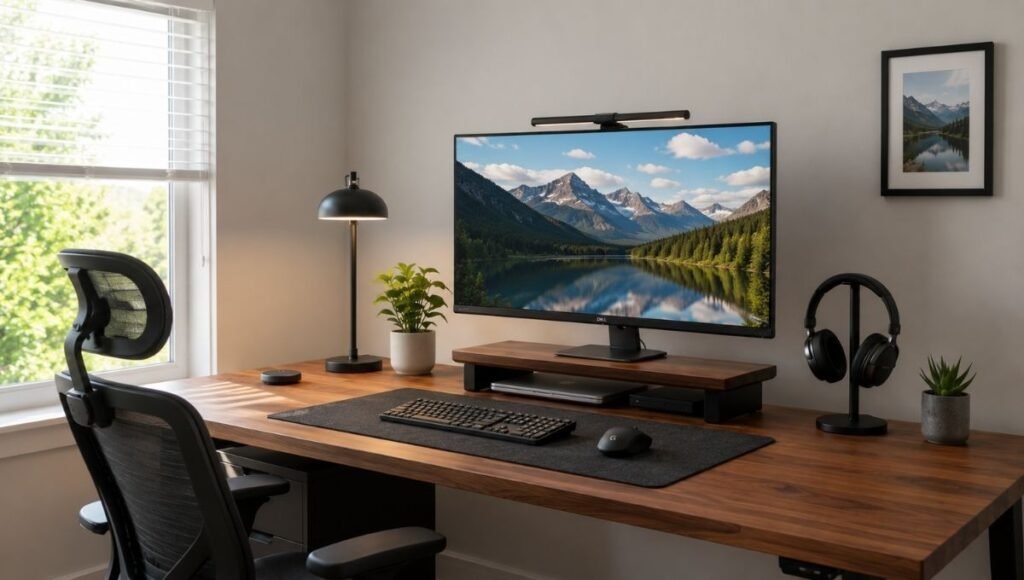
Clean Desk Setup: The Minimal Version
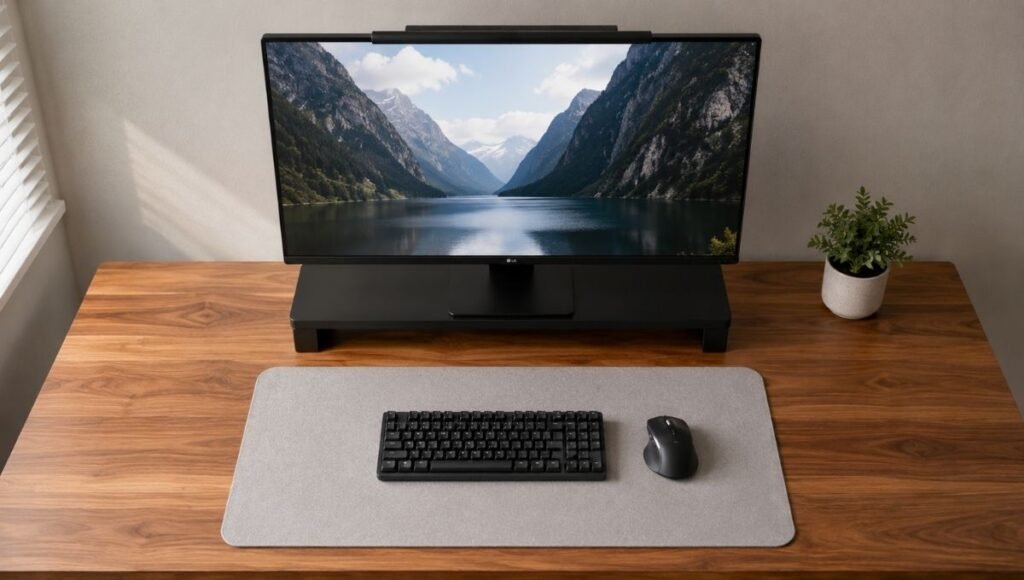
A clean desk setup isn’t achieved by buying minimal-looking products — it’s achieved by having fewer things on the desk surface and managing the cables. The visual effect comes from what’s absent, not what’s present.
The minimum viable clean desk: monitor at eye level, keyboard and mouse on a desk mat, cables completely hidden, no items on the surface that aren’t used daily. Everything else — supplies, documents, personal items — has a home off the desk surface.
The desk mat plays a specific role in this aesthetic: it unifies the keyboard and mouse area into a single visual element rather than two separate items on bare desk surface. One mat reads as intentional; keyboard plus mouse plus bare desk in between reads as cluttered even when clean.
Home Office Desk Setup: When the Room Constraints Are Real
Many home office desk setups exist in spaces that weren’t designed as offices — bedroom corners, living room edges, alcoves. These constraints change the approach but not the principles.
The most important adaptation for small spaces: go vertical. A shelf above the desk at 22–24 inches of clearance adds storage without adding floor footprint. A monitor riser creates usable space underneath for a keyboard when pushed back. An under-desk cable tray keeps the floor clear, which makes a small space feel larger.
For setups in shared rooms where the desk needs to disappear when not in use: a fold-down wall desk eliminates the floor footprint entirely, and the organizational system needs to be compact enough to clear in a few minutes rather than requiring a lengthy breakdown.
→ Full guide: How to Set Up a Home Office That Doesn’t Fall Apart After Two Weeks.
Frequently Asked Questions
What is the best desk setup for home office use?
The best home office desk setup is one built in the correct order: desk position and lighting first, ergonomic hardware (monitor height, keyboard position, footrest) second, cable management and organization third, accessories last. The ergonomic positions — monitor at eye level, keyboard at elbow height, feet supported — are the foundation. Everything else builds on and should not conflict with these positions. The specific products matter less than getting the positions right.
What do I need for a complete ergonomic desk setup?
The core ergonomic elements: monitor at eye level (monitor stand or riser), keyboard at elbow height (desk surface or keyboard tray), feet supported (floor or footrest), and lighting from the side rather than behind the screen. Secondary ergonomic additions: a desk mat for surface consistency, a wrist rest for typing pauses, and a footrest if feet don’t reach the floor comfortably at correct chair height. Everything beyond this is organizational or aesthetic.
How do I keep my desk setup clean and organized?
The two highest-impact changes: cable management (clips along the desk edge, a cable tray under the desk holding the power strip off the floor) and a defined spot for every daily-use item on the desk surface. The desk stays clean not through effort but through systems — when every item has an obvious, easy-to-return-to location, things go back automatically rather than accumulating on the surface.
How much does a good desk setup cost?
A complete functional ergonomic desk setup — monitor riser, desk mat, cable management, and basic organization — costs $80 to $150 in accessories beyond the desk and chair. A more complete setup including a USB hub or docking station, monitor light bar, headphone stand, and footrest runs $200 to $400. The diminishing returns kick in quickly beyond this range — the foundational ergonomic positions are achievable at the lower end of this budget, and higher spending primarily improves aesthetics and convenience rather than function.
What order should I set up my desk?
Position and lighting first (free, highest leverage). Monitor height second — this is the ergonomic anchor point everything else is measured against. Keyboard and seating position third, adjusted to match the monitor height. Footrest fourth if needed. Desk mat fifth. Lighting sixth. Connectivity (USB hub or dock) seventh. Cable management eighth — after all positions are confirmed so routing is final. Peripheral storage (headphone stand, etc.) ninth. Accessories last, only for specific identified problems.
Build It Once, Use It for Years
A desk setup built in the right order, with ergonomics as the foundation, holds up. The positions that support the body correctly don’t change as accessories are added or swapped. The cable management done after positions are confirmed doesn’t need to be redone. The organizational system established before accessories are purchased has room for the accessories that genuinely earn their place.
The setups that get rebuilt every six months — the ones that look great in a photo and feel wrong to work at — usually got the order backwards. Accessories first, ergonomics as an afterthought.
Start with where the desk goes. Then the monitor height. Everything else follows.
Complete guides for every element of your desk setup:
- Monitor Stand — why your screen is too low and how to fix it
- Laptop Stand for Desk — ergonomic height and which stand works
- Keyboard Tray — do you need one and which type works
- Wrist Rest — keyboard, mouse, and whether you actually need one
- Footrest — do you need one and which type makes a difference
- Desk Mat — size, material, and whether you need one
- Monitor Light Bar and Desk Lamp — how to fix your workspace lighting
- USB Hub and Docking Station — how to stop running out of ports
- Headphone Stand — which type works for your desk
- Desk Cable Management — hide every wire without drilling
- Cable Tray — how to choose, install, and keep it working
- Desk Organization Ideas — systems that actually hold up
- Desk Accessories — what’s worth buying and what isn’t
- How to Set Up a Home Office That Actually Works
References: OSHA — Computer Workstations eTool: Ergonomic guidelines for workstation setup (osha.gov) · Cornell University Human Factors and Ergonomics Research — Workstation setup and musculoskeletal health in office environments (ergo.human.cornell.edu)
WorkDeskLab is reader-supported. If we recommend a product, we may earn a small affiliate commission at no extra cost to you. This never influences what we recommend. See our Affiliate Disclosure for details.